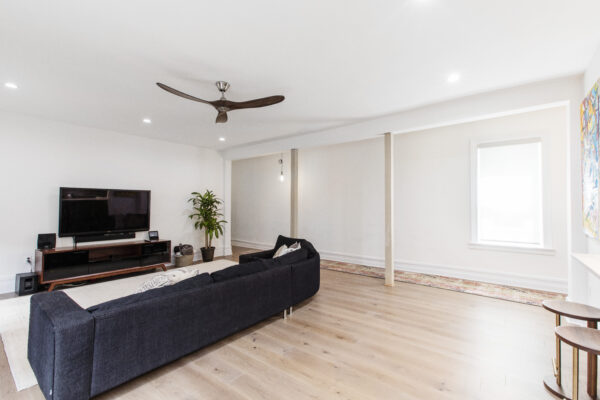
Yes, some NYC basements, cellars, and attics can become ADUs, but the existing space has to meet the requirements for a legal independent dwelling unit. Simply finishing a basement or adding rooms to an attic isn’t the same thing as creating an approved ADU.
For attic ADUs, DOB requires compliance with the applicable requirements for items such as ceiling height, egress, fire separation, insulation, ventilation, natural light, and sprinklers. HPD describes an attic ADU as one that uses habitable space beneath the roof without increasing the home’s footprint.
Basements and cellars are more complicated because NYC distinguishes the two based on their relationship to grade, and below-grade spaces have their own rules. HPD says a basement or cellar ADU must address requirements involving ceiling height, light and ventilation, separate access, fire protection, moisture conditions, and flood risk.
From a renovation standpoint, those conditions can shape the project before the finishes even come into the picture. Sweeten’s guide tobasement renovations that add usable space highlights how ceiling height, plumbing, electrical work, waterproofing, ventilation, flooring, and layout can influence what an existing lower level can become.
A documented Sweeten project in Sunnyside, Queens, shows that in practice. Gordon and Tracy’sbasement remodel in a 1925 townhouse included leveling an uneven floor, working around ceiling-height constraints, adding ventilation, installing a new door and window, and reworking the bathroom, laundry, and storage.
Their finished basement wasn’t presented as an ADU, so the project isn’t proof that the space would qualify under today’s rules. It does show the kind of physical conditions a homeowner and project team may have to work through when adapting existing below-grade square footage.
There’s also an important legal distinction involving Local Law 126. That law created a separate pilot program for legalizing certain basement and cellar apartments that already existed and were occupied before April 20, 2024, in designated areas.
DOB currently says applications for the Local Law 126 pilot aren’t being accepted until the Department’s rules for the program are promulgated. Homeowners planning a new basement or cellar ADU shouldn’t assume that this legalization pilot is the same approval path as creating a new compliant unit under the broader ADU framework.
Planning a family spring break trip can be challenging – especially if you’re looking for somewhere warm, unique, and not overrun with other spring breakers. But ever since we moved full-time to the unofficial spring break capital of the United States (aka: Florida’s Emerald Coast), we’ve become well-practiced in finding unique spring break destinations. So here are 8 places that we have loved visiting for family vacations.
These are all places we’ve traveled to in the last 5 years, when our kids were between 8 and 15 years old. So we can personally vouch for how well they keep kids and teens entertained. We can’t speak specifically for toddlers, but they generally had a lot to see and do, and felt family-friendly.
1. New Orleans, Louisiana
New Orleans is a surprisingly kid-friendly city. It’s walkable, colorful, and brimming with equal parts history and quirk. Spring break can be a perfect time to visit “The Big Easy” because you’ll likely be there after Mardi Gras and before the summer heat moves in. We had a blast exploring the Garden District, taking a streetcar to the French Quarter, and shopping along Magazine Street. You can also check out the aquarium downtown or the zoo in Audubon Park. Next time we go, we’ve got City Park on our must-see list. It’s twice the size of New York’s Central Park and has a botanical garden, sculpture garden, and even a small amusement park.
Average March and April temperatures in New Orleans, LA are typically in the 50s (low) to 70s (high).
Read our full New Orleans with Kids trip recap for more ideas.
2. Charleston, South Carolina
Another city our whole family enjoyed exploring was Charleston, SC. Like New Orleans, you’ll be catching a charming, walkable Southern city just as temperatures are warming up, but before the heat and humidity take over. Staying in or near the city itself helps you avoid the crowds that are beginning to flock to nearby beaches like Isle of Palms, Sullivan’s Island, or Folly Beach, which are just a short drive away if you really need some sand between your toes.
Average March and April temperatures in Charleston are typically in the 50s (low) to 70s (high).
Read our full Charleston with kids trip recap for everything we did, ate, and explored.
3. Palm Springs, California
Like these other destinations, Palm Springs has some of its best temperatures during the spring. It’s located in the California desert, meaning summer temps routinely hit triple digits! Plus, Palm Springs is more than just golf courses and mid-century architecture. We found kid-friendly attractions, like the Cabazon Dinosaurs (above) and nearby Joshua Tree National Park. You can also go on a waterfall hike or take a rotating aerial tram up the mountainside if you’re looking for more adventure. And since winter is peak visitor season for Palm Springs, we found it to be relatively quiet in early spring!
Average March and April temperatures in Palm Springs are typically in the 50s (low) to 80s (high).
Read our full Palm Springs with Kids recap for more recommendations.
4. Dallas, Texas
Dallas surprised us with how much personality and how many activity options it has for our family – from charming neighborhoods and outdoor parks to sprawling museums and unique entertainment spots. We spent a surprising amount of time in the Dallas Museum of Art and thePerot Museum of Nature and Science, and could’ve spent even more time playing unlimited pinball at Cidercade (above). We felt like we barely scratched the surface of what Dallas has to offer, so we’ll definitely be back. Just be sure to check if you’re traveling when local schools are also on break, because it might be smart to avoid those crowds.
Average March and April temperatures in Dallas are typically in the 50s (low) to 70s (high).
Read our full Things We Loved in Dallas for more recommendations.
5. Serenbe, Georgia
Located about 45 minutes south of Atlanta, this small “new urban” town focuses on nature, wellness, and community. It was one of our most peaceful Spring Break trips ever, where the kids spent hours exploring the woods, playing in creeks, and forgetting about their devices. We also ate lots of good food, shopped at sweet local stores, Sherry and our daughter enjoyed a spa day, and we all rode horses to a waterfall!
Average March and April temperatures in Serenbe are typically in the 40s (low) to 70s (high).
Read our full Serenbe, Georgia trip recap for more recommendations.
6. St. Petersburg, Florida
It should be no surprise to see a Florida destination on a spring break list (our entire state is basically a tourist destination due to warmer weather than most of the country at that time of year). But choosing to stay closer to downtown St. Petersburg (instead of other nearby beaches like St. Pete Beach and Clearwater) can help you avoid some crowds and help you have a more unique Spring Break experience. The city of St. Petersburg is fun and colorful, with lots to explore – including The St. Pete Pier (above), the Grand Central District, and the impressive The Salvador Dalí Museum. We really liked this trip!
Average March and April temperatures in St. Petersburg, FL are typically in the 60s (low) to 80s (high).
Here’s our full St. Petersburg family vacation recap for more ideas.
7. Ocean Springs, Mississippi
Ocean Springs caught our eye on Southern Living’s 15 Most Adorable Small Towns and we had a great time exploring its throwback charm, fun shops, and enjoying some really nice weather. You’ve got cute ice cream and donut shops, trendy coffee spots, and more in a very walkable and golf-cart-able town. They also have a sandy beach that fronts the Biloxi Bay, which offers chill, calm waters for all ages to safely enjoy.
Average March and April temperatures in Ocean Springs, MS are typically in the 50s (low) to 70s (high).
Here’s our full recap of our weekend in Ocean Springs for details.
8. Cape Charles, Virginia
One of the reasons we were so taken with Ocean Springs is because it reminded us of Cape Charles, Virginia – the historic Chesapeake Bay town where we used to own a beach house and our rental duplex. It too had a small, walkable downtown and bayfront beach that only really gets busy on holidays like Memorial Day and the Fourth of July. Cape Charles may not be warm enough for a dip in March or April, but there are museums, state parks (including wild horses at Chincoteague), and more in the surrounding area that’ll keep your family the perfect amount of busy. If you’re looking for a chill and charming spot, Cape Charles has it in spades.
Average March and April temperatures in Cape Charles, VA are typically in the 40s (low) to 60s (high).
Check our guide to Cape Charles for our favorite places and activities.
BONUS: Pigeon Forge & Gatlinburg, Tennessee
I’m listing this as a “bonus” because this is the spot we’ve chosen for this year’s spring break vacation. So while I can’t name our favorite activities yet, I can tell you that we’ve got a full list of things we’re excited for – everything from Great Smoky Mountains National Park and Dollywood to the crazy Airbnb we booked with friends that has a game room, indoor mini golf course, movie room, and more! The rental houses there generally seem to be full of bells and whistles (more than one had a nerf room! like for shooting foam darts at each other). Should be a very entertaining town…
Average March and April temperatures in Gatlinburg are typically in the 30s (low) to 70s (high).
UPDATE: We’re back from our Pigeon Forge spring break and had the best time! You can read our full recap of the Tennessee Smoky Mountains trip.
More Vacation Ideas
We’ve also got a whole library of blog posts with more Road Trips & Travel recaps if you need more spring break ideas.
I’ve shared a lot of real-time renovation updates on Instagram Stories, but here’s a quick catch-up blog post for anyone thirsty for the longer format (we know we’ll love having these posts to look back on). We’re about 7 weeks into our biggest renovation in over 5 years, and the house pretty much looks as chaotic as expected. Who remembers our mantra from 2012: “the middle makes no sense“? Over the past month and a half, walls have been busted open, ceilings have been torn out, and entirely new rooms have been framed. So… lots of progress, but lots of dust… and a lot more to do. Did I mention it’s dusty?
The easiest way to catch up is to watch the video below, where you can hear me yapping about every space, what has been done, and what’s next on the agenda. If you can’t watch with sound right now, come back later for the info (it covers a lot more than I can in words, but the rest of this post will give you a quick status update in the meantime, plus tips for the dust & smaller house optimization ideas).
Note: You can also watch this video on YouTube
As a reminder, two sticking points emerged and slowly began to nag at us over the last half a decade of living here. They both felt important enough that we didn’t want to settle on just fixing one of them and thankfully, nothing felt urgent enough that we couldn’t wait for the right idea to come to us. It certainly wasn’t the first idea that we had. It took a few years, but we finally hit on a plan that would accomplish both goals while feeling a lot more exciting and less complicated than many of the other options we considered (no moving the kitchen, always having a working bathroom throughout the reno, no attempts to run plumbing upstairs, which would be extremely complicated in our house, etc). Plus the estimate came back under what we expected to pay, which never happens! So without further ado, our two main goals:
Enlarge our son’s small room (what’s great for a 6-year-old isn’t always great when they’re twice as big and very into every crafting project under the sun)
Get better access to & views of our backyard pool area (a long hidden hallway that felt detached from the main living area wasn’t ideal)
And one bonus thing we threw in “since it’s going to be extremely dusty anyway” was to add an ensuite bathroom to our bedroom. Surviving covid times with just one bathroom for the last almost-6 years truly showed us that we don’t NEED a second bathroom, but it made sense to add one while we were undergoing this renovation. Especially because our contractor pointed out how easy (and inexpensive) it would be to run all the plumbing under our raised deck.
Finishing The Porch
After many years of percolating and debating approximately 101 other options, one day we realized that if we just finished our covered front porch (seen in the old photo below) into a fully conditioned room, all of our goals would be accomplished in one fell swoop. Turning that into our daughter’s new bedroom (it’ll be slightly larger than her last one, but pretty similar) would allow us to open up her old bedroom to the kitchen and sitting area, which existed right behind it, creating a large L-shaped shared space that would lead to the pool with some giant glass doors. Plus we could absorb the old pool hallway into our son’s room to enlarge it (making it not only significantly wider, but also deeper). Definitely watch the video above – even without sound if you can’t listen to it – to see the stunning change that one move has made for us!
Here’s what the outside looks like now. They’ve fully built the new bedroom, but you can see in the video above that there’s still a lot to do to finish the interior of it. And of course it still needs to be fully painted.
That one patch of white paint was put on because we were originally told that our house’s electrical boxes had to be mounted there, but we figured out a way to relocate them on the fence that you see on the left of this photo instead, which hides them a lot more (both from the curb and the front porch). Now when you walk up the path to the door and stand on the porch, you won’t even see them (versus seeing three large metal boxes in that painted white square).
A Better View (And Access) To Our Pool
Moving back inside, this was the old “view” of our backyard pool from our downstairs living area. Notice how you can’t see it at all? Yup, that was the problem. It was fully blocked by the laundry room (behind those doors) and our daughter’s bedroom (behind the laundry).
And this is how it looks today! Hello new room full of light where we all can enjoy with the best view in the house! Hello easy pool access from the main living space, and getting to sit on a sofa overlooking it all when we entertain. Hello extra hangout spot with a TV that the kids negotiated (we’ve had just one TV in the house since we moved in) so they’re beyond excited too.
It’s incredible how much light this one renovation move has unleashed into our house (which was already the brightest home we’ve ever had!). It’s also wild how much bigger everything feels, which is like winning the lottery in a small home. Literally my goal is: less to clean, care for, and pay to heat/cool/furnish… but let’s make it feel as open and airy as possible!
And since the sitting area function that used to be in our kitchen will be moving into this newly adjoined space, our kitchen can stretch out a little more to include some extra cabinetry and a peninsula with some stools, and our dining table can float in the area that used to be the sitting area. That way it can seat 8 people instead of only 6 (it’s currently sandwiched in a narrower area between a fridge and a wall). We often have 10 people in this kitchen with friends over, so seating for 8 at the table and 3 at the peninsula would be amazing.
This new “lounge” area will be vaulted (like our daughter’s room was originally) which will also make the room feel bigger and airier. The photo below was taken from our bathroom and it shows how open this view has become. You can look at the framing on the floor to get a sense of where those light-blocking walls used to be:
This view also shows where the new laundry closet will go. There will be a door on that wall (under that header with the HVAC ducts) that will house our stacked washer and dryer. The closet itself recesses into our daughter’s room with her bedroom closets next to it, so it won’t take a weird bite out of her floor plan (her new room will be a very similar size and shape to her old room). I know it’s hard to picture how a laundry closet can recess into another room and fit together with a closet in that room, so watch the video for a better idea of how everything fits together if you can.
A Bigger Bedroom For Our Son
Since we’ll now access the pool via the lounge area, the old hallway that led to the backyard can become a part of our son’s room… widening it from a snug 7′ to a whopping 11′ feet! You can see from the mark on the floor (and where the ceiling planks end) how much narrower his room used to be – and it’s such a great change. We were also able to move the entry door to his room further back (again, stealing space from that hallway) to make his room deeper. Adding a window that’s twice as big as his old one was the icing on the cake. The difference is wild.
We were also able to vault his ceiling higher (since his room increased in depth, which means more of the highest peak of the house is included in his room). We’ve all been stunned by how these changes have come together to make a giant difference. This kid can’t wait to fill his new, bigger space with craft supplies and yarn galore.
Oh and this is also the room where we discovered a secret safe buried in the concrete foundation of the house! Don’t forget to check out “The Safe” archived circle on our Instagram if you missed that whole story. I’ve never felt more like Indiana Jones.
Our Ensuite Bathroom
Living with one bathroom really hasn’t been a huge headache (we thought we’d move in and immediately want to add one, and now it has been almost 6 years), but when we were planning this reno with our contractor, we all agreed it made sense to go for it while we’d have plumbers, electricians, and drywallers in the house. Running the plumbing over to this space couldn’t be easier because there’s a raised deck between this room and the new bedroom we made for our daughter (formerly the covered porch, under which all the house’s plumbing was housed!). So tapping into it took less than a day! Such a win.
The new ensuite bathroom is taking over a nook in our bedroom where our floating shelves used to live (see below). The room used to be sort of an L shaped space, and now the bedroom will be a normal rectangle with an attached bathroom off of it.
Even though it’s far from finished, it already feels like it was meant to be this way!
Turning this corner into a bathroom required more maneuvering than just taking out those shelves. We had to relocate our bedroom door to our closet wall, which meant one of our wardrobes will now be placed to the left side of the door – where you see that lighter wood rectangle on the floor. We’re just waiting for drywall to go up on the wall behind it and we can place the wardrobe. Don’t worry, there’s a vision. We’ll also have a cabinet over the bedroom door, and actually, that entire side of the bedroom will appear to be seamless built-ins. It’s just hard to explain in words right now for you, so you’ll have to trust us 😉
Shifting the bedroom door into the large rectangular part of the room meant we could make the entire corner that made the room an L shape into our bathroom. Now we have the wall you see below (that used to be the doorway to our bedroom) to make a gorgeous floating bathroom vanity nook. Picture a huge gleaning mirror over it. I know, you have to squint very hard to picture it.
The bathroom won’t be huge by any stretch of the imagination, but it’ll provide plenty of function with a sink, a toilet, and a wall-to-wall zero-entry shower full of gleaming tile to the ceiling (that’ll be along the wall that’s opposite this nook – the one on the left in the photo below). You can see how the floor appears to dip down in that area, but once it’s all tiled, it’ll all be level and smooth. Zero entry excites us because I want to live in this house until I die, and then haunt it indefinitely.
Other Renovation To-Dos
Beyond those main changes that have been going on, there are several other little things we’ve had to figure out or shift along the way. For example, we’ll be rebuilding an outdoor shower on the back of the house (sort of where you can see the remnants of the old one). It’ll be accessed from the side facing the new french doors, so we’ll need to extend the patio slightly too. You can see from the color change in the roof (the new stuff will patina to look like the older stuff) how much interior space we gained, just by finishing off the front porch! It’s amazing.
Also, that random window you saw on the floor of our new bathroom a few photo up is actually going into our existing bathroom. That window used to be our son’s room, but rather than get rid of it, we’re swapping it with our current bathroom window, which is smaller and what I’d call “aggressively frosted.” We DIY frosted the old window that was in this bathroom, but when we replaced our windows and doors for hurricane-grade ones, we chose “factory frosted” for the new bathroom window. What arrived was a textured gray tone. It’s hard to see in photos, but it blocks SO MUCH LIGHT compared to the old one we had frosted ourselves (using our tried-and-true DIY method), which still provided complete privacy.
So we figured that reusing our son’s old window could correct a regret from the past, and not only let in more light because the frosting won’t be as dark, it’s actually about 6″ wider and taller, so it’ll be really great to make that room feel airier and lighter too. Gotta love using what you have.
How Are You Handling The Mess?
Yes, I mentioned dust several times. Renovations are messy. People are in and out all day, stuff gets tracked in, demo unleashes flying debris, things get cut and drilled, sawdust flies 20′ in the air. Heck, we haven’t even gotten to drywall yet, which is the dustiest part! So here’s what we’re doing to stay on top of the chaos while we’re living in our home during the renovation:
Drop Cloths – We use these to cover things like our sofa, our bed, and even to tape off entire doorways sometimes. You’d be amazed how they can be working around a corner or across the room, but dust can get literally everywhere.
Small Shop Vac – This is great for little piles of sawdust or debris that you encounter (random staples, etc). Our contractor is the most neat person we’ve ever worked with (he shop vacs and sweeps before leaving every day and even blows off our walkway for us) but stuff gets in weird spots that you miss, so we do another pass with our shop vac if we find a little pile of sawdust on a chair rail or in a corner.
Tineco Wet Vac – This has been the MVP, and we cannot believe we just bought it this January, because it’s making such a difference! It’s a vacuum mop, so it not only sucks up a ton of dust, it literally mops the floors for us in one pass of the vacuum, which means all the dried dust and chalky haze that would be left if we only vacuumed comes right up! Our feet and socks are clean when we walk through the house during this reno… which literally has never happened before with just sweeping and vacuuming.
The tip here? Do whatcha gotta do to stay sane during a reno. It gets old. And you’ll miss the days of a house that feels significantly less torn apart. This one isn’t even that bad because we haven’t ever lost our kitchen or bathroom (except for a few brief hours when the water had to be turned off). But even though renovations never feel like a walk in the park, they can be so exciting and full of possibility. We’ve been renovating houses for 20 years, and we’ve never regretted a single renovation after it’s done! (During… maybe. Ha!).
Our Tips For Living Large In A Smaller Home
Since this is a common question we get, so after almost 6 years of living here, here are some things we’ve learned in our downsizing journey:
make sure the bedrooms don’t feel cramped but aren’t ridiculously giant (our bedroom always felt too big and our son’s room felt too small – now both will be solved)
maximize sight lines and light that flows through shared living spaces (this feels more expansive) and vault the ceilings whenever possible (again, it just feels a lot less cramped)
furnish rooms, especially shared spaces, so you’ll actually use them, and not just for special occasions (if you don’t use your formal dining area much, maybe make it an art/homework room that gets tons of use)
take note of sticking points (this reno is solving two big ones, but we also get to address smaller things, like seating more people in our kitchen, adding a bathroom to our weirdly big bedroom to optimize how much that corner gets used, etc).
consider bigger furniture (often in a smaller house you think you need smaller furniture, but that can make it feel piddly. Think: two larger sofas instead of lots of small chairs and loveseats, maybe even a bigger bed in your room so you feel like you’re living large, etc).
remember that storage is king, and really brainstorm how to add it (from switching out a giant water heater for a tankless one to gain more space in a closet to building in some cabinetry along an entire bedroom wall, there are so many ways to make a smaller home more functional & efficient)
As a reminder, this house was 1400 square feet before this reno, and will end up being around 1520 square feet after converting the covered porch into interior space. So it’s definitely not a tiny house, but it was a big downsize for our family.
By comparison, our last house was 3150 square feet (plus a two-car garage, big detached shed, and a giant walk-up attic!).
When we started house hunting down here we thought 1900 square feet (like the pink house) would be ideal, but we went even smaller to be in this exact location. Our house is walkable to the beach and shops/restaurants in a tree-filled neighborhood that we fell in love with – so we chose location over square footage and we’re so glad we did.
The crazy thing is that everything in our neighborhood went crazy price-wise during and after covid, so it’s for sure much much much cheaper (like over 10X cheaper) to do this reno than attempt to buy a slightly larger house in our location. Plus we just love this exact lot, the pool we added, etc. So I guess another small space tip that I have is that it can be far more cost-effective to renovate than having to sell and buy and pay all the closing fees and have a whole new house you have to decorate and redo anyway.
It already feels like an embarrassment of riches (even in this very rough state) to have such beautiful views of the pool area from the front door and the downstairs living area now.
And having a bonus shared living space upstairs where the kids can get messy crafting, host sleepovers, or watch a loud movie with a bunch of their friends while we entertain the adults downstairs is such a great feeling. I talk more about that in the video, but I think two common areas that aren’t on top of each other = another way a small home can feel much larger and more flexible. This is an old picture of our upstairs room because it’s currently full of lots of things from downstairs – but we’ll have to snap some updated shots of this space after this reno, because we changed how the sofas are placed and it’s even more functional for us!
We’ll post another reno update after we’ve made more progress (next up: a few final electrical tweaks, insulation, drywall, tile, fixtures, and flooring). In other words, stay tuned to Instagram for more real-time updates, and we’ll be back here with another update, maybe sometime in March?
P.S. Did you miss our first post about this reno? It has tons of info and some other images to shed even more light on this project right here.
*This post contains affiliate links, so we may earn a small commission when you make a purchase through links on our site at no additional cost to you.
This year, we took our kids to the land of Dolly Parton, aka the Tennessee Smokies, for our recent Spring Break. It was a jam-packed week of family fun, food, and there was even a dusting of snow! There’s SOOOO much to do in this area of Tennessee – you’ve got Pigeon Forge, Gatlinburg, and Great Smoky Mountains National Park all right there. So we thought we’d hit the highlights and share our 7 favorite things that we did there. Why 7? Well, it’s smack dab in the middle of the numbers 9 to 5…
We traveled with another family, so we had 4 adults and 6 kids with us, ranging from ages 11 to 20. So all of these activities are tween and teen approved! We can’t speak specifically to younger kids like toddlers, but I think you’ll see that most of what we’ve listed below would be fun for the whole family.
Why Pigeon Forge & Gatlinburg?
We chose this destination for 2 reasons: (1) Dollywood and (2) there’s TONS of stuff to do in the surrounding area. It’s a little bit like Orlando or Vegas plopped in the middle of the beautiful Appalachian Mountains. Honestly, the sheer number of restaurants and roadside attractions is almost a little overwhelming. But that gave us the confidence that no matter the weather, we could show our families a good time. Plus, we could visit Dollywood, which most of us had never done (I had gone as a kid but nobody else in our party of 10 had ever been).
Since the area is packed with things to do, it’s easy to find activities that meet a variety of interests and energy levels – whether you want thrills, history, nature, games, shopping, or just some over-the-top Southern cooking. We were there in mid-March over a few days of cold weather (the last day, which we spent at Dollywood warmed up). It had been in the 70s the two weeks before we arrived, but we had temps in the 30s and 40s for most of our stay, but it was still really enjoyable
The area can get crowded, especially in the warmer months, and it felt like things were definitely marked up due to everything being pretty tourist-centric, but we expected that (a lot of Florida is like that too). So it didn’t stop us from savoring the wonderfully kitschy atmosphere of the area, and trying lots of things.
Our Top Pigeon Forge & Gatlinburg Activities
If you’re just here for the list, you can see it below. But we’ll explain each in a bit more depth further into this post. We obviously barely scratched the surface of all that there is to do in this region, but this includes many of the top attractions that a lot of lists we read before visiting recommended:
Dollywood
Ober Mountain
Dolly’s Stampede
Cades Cove
Crockett’s & Sloppy Hog
The Island, Alcatraz East, And Mountain Mile (our rainy day activities)
Our Airbnb
1. Dollywood
Dollywood was the whole reason for our trip, and it did not disappoint! I was last at Dollywood in 1999, and I remember my 17-year-old roller-coaster-loving self being underwhelmed. Well, a lot has changed. Keep in mind that our collective 6 kids regularly go on class trips to huge parks like Universal Studios in Orlando, and they all loved the roller coasters. I can safely say that Dollywood was the highlight of everyone’s Smoky Mountain vacation, and all 6 kids reported they’d be happy to go back anytime.
There were so many rides, shows, and uniquely themed sections of the park that we definitely couldn’t squeeze it all into 1 day, but we all hit a bunch of them, and it was remarkable in that almost everyone had a different favorite. In particular, our kids love the Big Bear Mountain coaster (shown below), others swore by Wild Eagle or Thunderhead, and I personally loved Lightning Rod, which took you up the side of a mountain for the first drop! Sherry’s favorite was The Dragonflier where your feet dangle as the coaster speeds and spins.
We also caught a couple of shows, shopped the gift shops, and ate as much cinnamon bread as our stomachs could handle (do NOT sleep on the cinnamon bread – it is delicious). The only downsides were some long lines, both for rides and food, since the week we visited was quite cold and we, along with what seemed like every other tourist, delayed our Dollywood visit for the last day of our trip, when things finally warmed up. Seems a lot of other people had the same idea! Even with the lines, we saw a lot of the park and had a great time.
2. Ober Mountain
Everyone’s second favorite outing was visiting Ober Mountain in Gatlinburg. It’s an all-season, outdoor amusement park that features everything from skiing & snow tubing to ziplines & mountain coasters, depending on the season. But perhaps the most memorable part of our visit was riding the aerial tramway up to the mountaintop park.
We visited in mid-March, so some of the winter activities (like skiing) were closed, but summer ones (like the “bobsled” course) weren’t open yet. We did the mountain coaster, the ice bumper cars, and talked with some super-friendly rangers at the Wildlife Habitat (that was a highlight for many of us). They explained why these animals weren’t suited for the wild anymore, due to injury, illness, or (in one case) an albino raccoon named Casper who was easy pickings for a predator due to his coloring.
Gatlinburg is actually home to a few mountaintop parks like this (including Anakeesta and SkyPark). They feature everything from swinging bridges, overlook towers, and scenic chair lifts. We chose Ober Mountain because it was the only one that offered a fully enclosed tram to the top on a very cold day. Anakeesta is adding one, but during our visit we would’ve been stuck on a bus. And it was too cold for a chair lift! But we hear great things about Anakeesta too – especially if you’re going when it’s warmer.
3. Dolly’s Stampede Dinner Show
Pigeon Forge offers several themed dinner shows, including Dolly’s Pirate Voyage and the Hatfield & McCoy Dinner Feud. They feature some combination of acrobatics, comedy, storytelling, music, and a multi-course meal. We’ve been to Dolly’s Pirate Voyage show twice before (there is one somewhat close to us in Panama City Beach, FL), so we opted for Dolly’s Stampede.
To be honest, we were a little nervous about the “North vs South” language on the website. But we decided to trust in Dolly and the show turned out to be more Wild West-themed than anything else (there were actual buffalo and so many cool horse tricks – and all the animals are cared for extremely well as Dolly is known to do). The “sides” are just used for goofy competitions (like kids chasing chickens or dads tossing toilet seats like horseshoes) that always seem to end in a friendly tie. Much like Dolly’s real life personality, the show definitely had a unifying message at the end (her pirate show does too, btw).
Many parts of the Stampede are definitely a little campy, but we were legitimately wowed by the equestrian stunts, the very cool and sometimes adorable animals (including a mini highland cow!), and gorged on country cooking. I think we still prefer the Pirate Show – it’s a bit grander overall – but Dolly’s Stampede was definitely one of our favorite evenings.
4. Cades Cove in Great Smoky Mountains National Park
With all of the tourist traps and thrill rides, it’s easy to forget you’re also at the doorstep of America’s most visited National Park: Great Smoky Mountain National Park. And, it’s free to enter! You could easily spend a whole week in the park hiking to waterfalls, enjoying scenic overlooks, and visiting historical sites. But we took a friend’s advice and enjoyed the park via an 11-mile driving loop called Cades Cove.
Not only was this a good fit for a cold morning (hello warm car!) but it allowed us to sample the park at our own pace – pulling off to see a historic homesite or hiking a short trail as interest & energy allowed (which is sometimes hard to juggle with 10 people, including several teens). The dusting of snow that had fallen the night before made it even more beautiful!
Just a heads up that the loop closes to vehicle traffic on Wednesdays (many choose to bike it that day instead) and you may need to arrive early to avoid backups, especially on weekends. We went on a cold Tuesday in March and experienced a few slow spots & crowded pull-offs, so I can only imagine what it’s like in peak season! Oh, and you do have to pay $5 for parking pass if you plan to stop for more than 15 minutes anywhere in the park.
We usually have several restaurants to recommend from our trips, but have only 2 this time (3 if you count the Stampede above). That’s not because the meals were bad everywhere else. It’s because the food was usually so filling & indulgent that we were rarely hungry enough to eat out for dinner. In fact, every night except for The Stampede, we made dinner at home because breakfast and lunch were so filling we couldn’t imagine eating another big meal.
Everyone’s most memorable meal was at Crockett’s Breakfast Camp in Gatlinburg. It’s right down from the Ober Mountain tram station and we’re glad we put up with the 1 hour wait outside – it was WELL WORTH IT. The service was great, the pancakes were huge, and our friend declared it the best corned beef hash she’d ever eaten.
Another surprise favorite was Sloppy Hog’s Burger Joint, which we spotted on our drive to Cades Cove (sort of between Pigeon Forge and Townsend). Truthfully, we only stopped to eat on our way back because the teens had laughed at the name. I ordered the “Sloppy Dripping” (again, because of the name) and it’s one of the best burgers I’ve had in a long time. Think two patties with BBQ pulled pork on top. Mmmmm. And it wasn’t even that sloppy to eat.
Those were definitely the two meals we all talked about most for the rest of the trip. Well, that and the cinnamon bread at Dollywood… which I’m pretty sure counted as a meal at some point.
6. The Island, Alcatraz East, & The Mountain Mile (Our Rainy Day Activities)
Our very first day in Pigeon Forge was cold and rainy, so indoor activities were the move. This area has plenty to choose from – even things like indoor snow tubing – but these were the 3 that our whole group enjoyed:
The Island
While not technically indoors, this walking mall kept our crew busy popping into shops, eating snacks, and browsing rides like a giant skywheel, indoor flight simulator, and more. It’s almost like a mini amusement park! Parking was easy and free, and there was a convenient trolley to bring you right into the center of things.
Alcatraz East Crime Museum
Directly adjacent to The Island was the Crime Museum, which was sort of a Ripley’s Believe It Or Not with a true crime spin, both historical and contemporary. It was pretty interactive (which is always a hit with the kids) and there was everything from rooms about the Salem Witch Trials to displays of infamous cars, like the actual White Bronco from the O.J. chase. It was surprisingly educational and entertaining, including activities about criminal forensics, online safety, and more. Plus we noticed the brown van parked outside, and really liked the payoff about what that was when we walked through the museum and it was revealed.
The Mountain Mile
Similar to The Island (and close to it, as well – that’s its SkyWheel in the background) is another mall-meets-amusement center called The Mountain Mile. We went here a couple of times while our friends charged their Rivian at the EV superchargers, so we saw it in the rain and in clear skies. The kids loved the candy store, the toy store, and there’s even a Downtown Flavortown – which I’d never heard of. It’s like a Dave & Busters (aka: arcade) meets bowling alley wrapped in a Guy Fieri package. What more could you want on a rainy day?
7. Our Airbnb
I know the Airbnb we rented isn’t really an “attraction,” but it was a big part of our trip’s success. It fit our group super well, especially with us being two families who wanted to hang out together, but not necessarily be up in each other’s bathroom business. The house also had lots of amenities to keep our kids entertained, especially on our bad weather days. I saw TONS of similar options on Airbnb, so don’t fret if this particular property is booked. It seems things like hot tubs, ping pong tables, theater rooms, and a rustic cabin vibe are common features in this area!
Admittedly, all of the bells and whistles were a little over the top (um, hello indoor mini golf course?). They definitely made the trip memorable, and splitting it with another family kept the cost more manageable. But we mostly appreciated the layout of the house: the kids got to have the downstairs to themselves (with all of the games and the “theater room”) while we adults could enjoy some peace on the main level.
Overall, we all enjoyed being together, playing games, doing puzzles, and blasting Dolly Parton music to pump ourselves up. Oh, and there was a pretty epic rap battle one night amongst the kids.
More Places to Vacation With Kids
If you enjoyed this post, you can check out some of our other family vacation destination posts, which are all linked below!
In my lifelong quest to name everyone’s baby, I’ve posted a few lists of baby girl names and baby boy names, but what about names that defy easy categorization? Gender-neutral or unisex names are growing in popularity, and for lots of good reasons. Many see them as more inclusive, equitable, and adaptable. Some find them modern, cool, or even edgy. The rise in gender-neutral names also makes it easier for parents to use a family name or other sentimental or beloved name, regardless of their baby’s gender.
The “gendering” of names varies by culture, country, and even by generation, meaning some of these names may feel less “neutral” to you. People also bring personal associations to names, like pop culture references and real-life relationships. For example, which celebrity first comes to mind when you read the names Blake, Drew, and Robin? It might be completely different for different people you ask.
Was it Blake Lively or Blake Shelton? Drew Carey or Drew Barrymore? Robin Wright or Robin Williams? This exercise is just a reminder to keep an open mind when searching for a gender-neutral name. Your first instinct may not be everyone else’s!
Most Popular Gender-Neutral Names
We cross-checked the latest top 1000 baby names list for boys & girls to determine which names rankedhighest on BOTH lists. John helped me with this – you know he never met a statistic he didn’t love. So here are the top 20 gender-neutral names, determined by averaging their rankings:
Parker (#97 boys, #104 girls)
Riley (#229 boys, #42 girls)
Avery (#259 boys, #31 girls)
Rowan (#71 boys, #226 girls)
Charlie (#176 boys, #140 girls)
River (#112 boys, #214 girls)
Tatum (#195 boys, #205 girls)
Emerson (#270 boys, #151 girls)
Sawyer (#132 boys, #297 girls)
Logan (#46 boys, #391 girls)
Blake (#265 boys, #210 girls)
Rory (#226 boys, #286 girls)
Eden (#446 boys, #72 girls)
Cameron (#66 boys, #485 girls)
Carter (#45 boys, #507 girls)
Hayden (#154 boys, #401 girls)
Sage (#413 boys, #146 girls)
Angel (#63 boys, #498 girls)
Noah (#2 boys, #561 girls)
Oakley (#401 boys, 157 girls)
Now, you may notice some of the names above ranked significantly higher on one list than the other. For instance, Noah is way up at #2 for boys, but only #561 for girls. So we also looked at which names were most closely ranked across the two lists. These are arguably the “most neutral” of the top 1000 baby names:
Let’s look beyond what’s already popular. One great way to pick a gender-neutral name is to find something unique, since non-traditional names may not have as many pre-existing gender associations. Then again, there are plenty of classic names that have been used for both boys and girls. Here’s a longer list of names to consider:
Adrian
Aiden
Alex
Andy
Angel
Arbor
Archie
Arlo
Ash
Asher
Aspen
Aster
Atlas
Aubrey
August
Avery
Azriel
Bailey
Beck
Bentley
Billie
Blair
Blake
Bowie
Brooklyn
Brooks
Bryce
Cameron
Campbell
Carson
Carter
Casey
Chandler
Channing
Charlie
Collins
Corey / Kori
Cruz
Dallas
Dean / Deane
Denver
Devon
Dorian
Drew
Dylan
Easton
Eden
Elliot
Ellis
Emerson
Ezra
Fallon
Finley
Francis / Frances
Frankie
Gale
Greer
Grey / Gray
Harley
Harlowe
Harper
Hart
Hayden
Holland
Hollis
James
Jayden
Jesse / Jessie
Jett
Johnny / Johnnie
Jordan
Jude
Julian
Juniper
Kai
Keaton
Kelsey
Kendall
Kennedy
Kirby
Kit
Koda
Kyle
Lane
Lennon
Lennox
Logan
London
Luca
Marlow
Max
Merritt
Micah
Miles
Morgan
Murphy
Navy
Noah
Noel
Oakley
Ollie
Palmer
Park
Parker
Peyton
Phoenix
Presley
Quinn
Reagan
Reese
Remy
Ridley
Riley
River
Robbie
Robin
Rory
Rowan
Rumi
Ryan
Sage
Salem
Sawyer
Scout
Seneca
Shawn
Shelby
Shiloh
Skyler
Sloane
Spencer
Sullivan
Sydney
Tanner
Tatum
Taylor
Theo
West
Willow
Wren
Wyatt
Zion
More Naming Resources
To see all of our lists of names – including those split up by gender (and species!) be sure to check out the links below. Because if one thing is for sure, I also want to name your cat and your dog.
Pothos plants (Epipremnum aureum) aren’t just low-maintenance houseplants to own, they’re also some of the easiest to propagate! Propagation is a fun way to grow new pothos from your existing pothos plants, while also helping them stay healthy, full, and looking their best. And, since it requires no special tools or skills, it’s a virtually free way to grow your plant collection! We have, no joke, generated at least 12-15 free pothos plants using this method! You can even use them as gifts for friends and neighbors.
The propagation methods described below should work for all species of pothos (sometimes called Devil’s Ivy). You can read more about our favorite easy-care pothos varieties in our plant guides:
Why Propagate Your Pothos
You may think propagating plants is just for hardcore houseplant enthusiasts with too much time on their hands. But propagation is an easy and approachable way to get more out of your plants… even for beginners! It’s really a no-brainer, super-simple DIY project. Here’s why:
Low risk: Pothos are some of the easiest houseplants to propagate, so you’ll be rewarded with minimal effort.
Practically free: Most people can propagate using supplies they already own.
Healthier plants: Pruning your pothos promotes new growth. So even if your clippings don’t propagate, you’ve helped your main plant (aka “mother plant” or “parent plant”).
Less waste: Propagation keeps your clippings out of the trash
Save money: Grow – don’t buy – new plants to add to your collection
Great gifts: You can pass a new plant along to a friend or family member
Fuller pots: Propagated clippings can be planted back with their mother plant for a fuller look
And if that isn’t reason enough, propagating plants is also pretty fun to watch!
The Best Time To Propagate Pothos
Your propagation efforts have the greatest chance of success in the spring and summer months, during a pothos’ growing season. This is true for most houseplants, but it’s not an absolute rule…
You can certainly continue propagating in the fall and winter months, but cuttings may take longer to root or not root at all. During those months, we typically won’t start any new water propagations, but we will stick any pruned vines back into the mother plant’s soil. At worst, they don’t root, and we just pluck them out later. But they often will root, and we’ve helped our mother plant look fuller.
Where to Cut A Pothos For Propagation
To propagate a pothos, cut your vine just below a leaf node. Luckily, nodes are easy to find on pothos plants! They are the small bumps on the vine and usually have (or had) a leaf growing from the opposite side. These nodes are where new roots will form during propagation, and each node has the potential to become a new, separate pothos plant.
The photo above has many nodes by the way. I just pointed to one, but all of those rounded nubs protruding from the stem are nodes.
You just want to pick a healthy stem or vine on your parent plant to cut from – preferably one with new growth at the bottom and a leaf near the node(s) you plan to propagate. You can cut off as few as 1 or 2 nodes, but the more nodes you take, the more new plans you can grow. Try to leave at least 1/3rd of the original vine on the mother plant so it can continue to grow.
We typically let our pruning goals determine which vines we cut from and how much we remove. We look for vines that are getting too long or leggy – like the one shown above. We will propagate the bottom and cut off the rest of the bare vine. You can also try this “miracle” paste to regrow pothos leaves on bare nodes. We’ve had luck with it working about 75% of the time!
How To Propagate Pothos In Water
Water propagation is the most popular (and most fun) way to multiply your pothos cuttings into new pothos plants. It’s always our first choice because you can actively watch new roots grow!
Step 1: Take A Stem Cutting
Use clean* sharp scissors to remove a healthy section of pothos vine as described above. Make an angled cut just below a node (about 1 cm under the bump). This cut vine can be used altogether, or you can cut the vine between each node to create more (but smaller) starter plants. Be sure there is at least one leaf on each cut section.
*It’s important to clean your scissors or shears to prevent the spread of bacteria or disease from one plant to another. A quick way to disinfect them is to wipe or spray them with rubbing alcohol.
For my cutting, I’m going to propagate the 3 top nodes individually and then use the remaining bottom section of the vine as a whole.
Step 2: Remove Bottom Leaves
When propagating a longer vine, remove the leaves from any nodes that will sit below the water line. Submerged leaves will rot and spoil your water & cutting. That’s why we’ve plucked off a few leaves in the photo above. Skip this step if you are propagating individual nodes.
Step 3: Place Cuttings In Water
Fill clear, glass vessels with room-temperature water. Tap water works great. Make sure all the nodes that you want to produce roots are submerged, but not any leaves. You can use a clothespin or bobby pin over the mouth of your vessel to keep your cutting in place if needed.
Any type of vessel will work, but a clear glass cup or jar makes it easiest to monitor your water and watch for root growth. Clear vessels also allow the most light to reach the cutting. Place the vessel in a spot that gets plenty of bright, indirect sunlight. We love lining these up on a windowsill, desk, or bookshelf in the sun.
Step 4: Monitor The Water
Keep an eye on your water’s clarity and level. You may need to top off your vessel as water evaporates. You can also change the water if it starts to look excessively green or murky, but we rarely experience this.
Step 5: Transfer Rooted Cuttings To Soil
Pothos roots may develop from the node in as little as 1-2 weeks, but we usually leave them for a month or two. They are very happy in water, so there’s no “ticking clock” to remove them at any point. But let the roots grow at least 2-3 inches before transferring the cutting to soil.
Be sure to use a well-draining potting mix and a nursery pot with drainage holes. Once potted, give your new plant a good watering and return it to a spot with bright indirect light. Keep the soil moist for the first couple of weeks to help the roots establish in their new home.
How To Propagate Pothos In Soil
Soil propagation is another popular technique for pothos plants. The advantage of this method is that it eliminates the step of transferring your cutting from water to soil. However, you won’t be able to watch new roots grow, which makes it a bit harder (and less rewarding) to gauge your success.
Step 1: Take A Stem Cutting
Like with water propagation, use a clean, sharp pair of pruning scissors to cut your pothos vine slightly below a node. We like to take a cutting with at least 3-4 healthy leaves.
Step 2: Remove Bottom Leaves
Pluck off the leaves from the lower 2-3 nodes on your cutting so that they can easily be buried in the soil. The more nodes you bury, the more chances you’ll have for strong root development, so feel free to do more. Just be sure to leave 2-3 leaves above the soil as well.
Step 3: Plant In Soil
Fill a small nursery pot with well-draining potting soil. We like to moisten the soil first by running water through the pot and letting it drain out the bottom. Just don’t compact the soil too much. Then, plant the cut end of your vine in the soil, making sure the appropriate nodes are fully buried (no leaves should be under the dirt). Cover and pat the soil gently to keep the cutting in place.
You can also use a bobby pin, paper clip, or plant pins to keep the cutting in place. These help the nodes stay in contact with the soil so they can develop roots. This is especially great for longer clippings, where you may need to coil the excess vine on the surface of the soil.
You can also plant multiple cuttings in one pot or follow this process in the same pot as the mother plant. This method (which is often called “basketing”) is a great way to keep your pothos looking full and healthy.
Step 4: Water Regularly
Put your potted cutting in a location that receives bright, indirect light and keep the soil moist for the next several weeks while roots develop. You will need to water it more regularly than an established pothos. Just be sure the pot drains well so it doesn’t sit in water (which can rot the roots). If your new plant seems to be doing well after a few weeks, you can begin to space out your waterings.
Other Pothos Propagation Methods
Propagate Pothos In Sphagnum Moss
Sphagnum moss is an absorbent natural material that can be used as a propagation medium, with similar steps to soil propagation. Some prefer to use sphagnum moss because it retains moisture very well, which helps to promote root growth. However, there’s no strong advantage over other methods, especially if you don’t already have it on hand.
Spaghnum moss is sold when it’s dry, so it must be soaked in water for about 30 minutes before use. Wring out most of the water, leaving the moss moist, and place it in a jar or other vessel. Plant your cutting in it (just like you would with soil) and water it regularly to keep the moss moist while roots develop. Once they’ve grown a couple of inches, you can remove the plant from the moss and plant it in soil.
Pothos Basketing
I mentioned this method a few paragraphs ago, but another option for propagating an established pothos is called “basketing.” It doesn’t produce new plants, but can help a stringy or leggy pothos look much fuller and healthier. Pothos, especially those with dangling vines, tend to look bare at the top over time. This is because the plant is focusing its energy on growing new leaves at the end of the vine. As older leaves at the top die and fall off, the upper part of the plant can become sparse and bare.
To fix this, just coil those long vines into the pot so that several nodes come into contact with the soil. Pretend like you’re making a basket or nest of vines atop the dirt. If needed, you can use plant pins, bobby pins, or paper clips to hold the nodes tightly against (and ideally, slightly under) the soil. Over time, these nodes will establish new roots and may shoot new growth down into the potting soil.
Even if new roots don’t establish quickly, basketing your pothos immediately helps the plant look fuller and healthier. And don’t worry if you miss those long, dramatic vines – they’ll grow back quickly!
Where to Place Your Propagation Vessel
It’s best to place pothos propagation vessels in areas that receive lots of bright, indirect light. Even though pothos are one of our favorite low-light plants, they need ample sunlight to produce new growth during propagation. Windowsills or sunny bookshelves are great options, but avoid spots that get prolonged direct sunlight. This can cause your water to evaporate quickly, burn your leaves, or accelerate algae growth – although we’ve never had this happen, even in a sunny windowsill.
Your propagating plants also need warmth, so keep them away from drafts or blasts from your A/C vents. We also suggest putting them somewhere you can easily check on them – like a kitchen window. This will help you better monitor water levels and root growth.
How to Care For Pothos
Once your propagated pothos has had a few weeks to establish in moist soil, it can be cared for just like your mother pothos plant. We have detailed plant care guides for golden pothos, neon pothos, and marble queen pothos varieties (along with tips for telling them apart). Also Marble Queen would make a great band name.
Overall, these plants enjoy locations that receive medium, indirect light but also tolerate low-light conditions as well. They like to be thoroughly watered every 7-10 days, allowing the soil to dry out between waterings. Underwatering is preferable to overwatering, and make sure they don’t sit in excess water. We typically like a layer of small rocks on the base of a planter full of potting soil, which helps to ensure that there’s not a bunch of standing water gathering at the bottom of the pot.
More Plant Guides
If you’re looking for more information on some of our favorite plants, check out some of these posts below:
*This post contains affiliate links, so we may earn a small commission when you make a purchase through links on our site at no additional cost to you.
Our neighbor recently asked for help adding a drip irrigation system to their new garden. My last experience with a DIY irrigation installation was pretty intense, so I was wary. But installing drip irrigation was the total opposite. It was easy, affordable, and fast. Plus, it only cost around $75 and took just a few hours to install. It’s also a much more efficient way to water your plants than traditional sprinklers – so there’s a lot less water waste.
Drip irrigation systems can be installed right onto a typical outdoor spigot, so no special equipment or plumbing experience is needed. They’re great for flower beds, vegetable gardens, shrubs, and even large trees because you get precise control of the amount of water that each plant receives.
What is Drip Irrigation?
Drip irrigation is an easy & efficient method for watering plants in gardens, mulch beds, containers, and more. Unlike sprinkler irrigation, which is used for lawns, drip systems deliver water directly to the soil at the base of each plant through slow, low-pressure hoses. This has several advantages:
Less wasteful: Less water is lost to evaporation, overspray, and runoff than with sprinkler systems. Drip irrigation systems are said to use up to 50% less water!
More efficient: Precise watering to the plant’s root zone means shorter, more effective watering times.
Highly customizable: Flexible hoses and a variety of emitters make it easy to get each plant exactly the water it needs.
Easy to install: Requires no special tools, plumbing knowledge, or previous experience. You can add an entire system in just a couple of hours!
Affordable: This $55 drip irrigation kit has everything you need (just add a hose timer!).
They are also a more durable, permanent, and targeted solution than soaker hoses. Those are good for quick, low-effort set-ups if you’re getting new plantings established, but soaker hoses tend to deteriorate over time. So once again, a drip irrigation system wins!
So let this be your sign to drop whatever excuses you’ve been using to put off installing a drip system in your garden or yard. I know I’m kicking myself for not doing it sooner. Yes, I’m adding one to our house thanks to the simplicity and efficiency of the setup that I did for our neighbors.
How Does A Drip Irrigation System Work?
Drip irrigation systems use a series of hoses, flexible tubing, connectors, and emitters to transport a slow flow of water to your outdoor plants. Whereas traditional lawn irrigation uses high-pressure water to activate sprinklers that can spray long distances, drip systems mostly just, well, drip. Here are the key components, all of which are included in this drip irrigation kit (except for a hose timer).
This post is not sponsored in any way. We were just very impressed with the ease of the drip irrigation kit… and it only cost $55! And when you add in a hose timer, which is the only other component you need if you want this to run on autopilot instead of manually, it still clocks in around $75, all in!
Drip Irrigation Tutorial Video
In the video below, we take you through all of the parts of the drip system. You can also read the instructions below the video.
Note: You can also watch this video on YouTube.
Hose Bib Connectors
As I explained in the video above, you can hook up a drip irrigation system to any outdoor spigot or hose bib, but there are a few important items to make this connection. Everything in the list below is included in the the drip irrigation kit except for the hose timer, so buying materials for this entire project is really easy.
Timer (not pictured): A sprinkler timer helps you schedule regular, automated watering. You can also buy a multi-zone timer to create separate schedules for different areas of your yard or a smart timer to program from your phone.
Backflow Preventer: This keeps water in your irrigation lines from flowing back into the municipal water supply, should there ever be a drop in pressure on their end. That way, potential contaminants in your yard (fertilizers, pesticides, etc) don’t get in the local drinking water.
Filter: A small mesh filter (usually included in the backflow preventer) keeps debris like sand and rust from clogging your lines
Pressure Regulator: This helps reduce and stabilize the water pressure from your hose to a lower, consistent flow that’s more suitable for drip irrigation.
Drip Adapter: Lastly, this connector allows you to attach 1/2″ or 5/8″ irrigation hose to a standard 3/4″ hose bib.
Once again, all of these pieces (except for the timer) are included in the kit. I loved how simple it was to just grab two things and be able to do this whole project myself in a few hours. If you’re setting up multiple zones, you can buy additional connection kits that include all of the pieces linked above.
Main Line
The majority of a drip irrigation system is a series of flexible hoses that can be arranged to fit your space. The “main line” transports water from your spigot throughout your garden (not to individual plants), sort of like how a water main runs through your city or neighborhood (not to individual houses).
1/2″ Tubing: This 1/2″ polyethylene tubing – sometimes called flex pipe or “funny pipe” – is sold in various lengths. It can be cut using household scissors.
1/2″ Connectors: These connect sections of main line tubing and come in a variety of shapes (tees, elbows, etc) so you can match the shape of your space. Simply push the tubing onto the barbed ends to secure it.
1/2″ End Closure: These end closure rings pinch the open end of your main line closed.
Driplines
From the main line, a variety of smaller, flexible driplines branch off to the individual plants. Think of these like the unique water lines that connect individual homes to the municipal water main.
1/4″ Tubing: Also called distribution tubing or “spaghetti pipe,” this is a smaller, flexible hose that can also be cut using scissors.
1/4″ Connectors: These barbed connectors are similar to those for the 1/2″ tubing, but are also used to connect each dripline into the main line. You do this by puncturing one barbed end through the side of the main line.
Goof Plugs: These are barbed endcaps that can be used to plug any open ends of 1/4″ tubing. They can also be used for any small puncture in your 1/2″ main line.
Emitters
Emitters are the small devices on your driplines that determine how (and how much) water is delivered to each plant.
Here are some common types of emitters:
Drippers: These are the most common emitters in a drip system. They are installed at the start or in the middle of the dripline and control the release of water to a consistent drip. Different colors indicate different flow rates measured in gallons per hour (GPH). Commons speeds are 0.5 GPH, 1 GPH, 2 GPH, and 4 GPH.
Tubing Stakes: These clips hold the ends of your driplines so you can stake them exactly where you want them.
Bubblers: These attach to the end of a dripline and emit 8 small streams of water in a tight circle, reaching a small cluster of plants.
Sprayers (not pictured): These emitters are closest to a traditional sprinkler, with a spray head placed on a raised stake. Sold in full circle, half circle, and quarter circle varieties.
And that, folks, are all of the key pieces that go into a DIY drip irrigation system.
Steps To Install A Drip Irrigation System
Now that you understand the parts of your drip system, putting it all together is very straightforward.
Plan Your Layout
Gather Supplies
Give Your Tubes Some Sun
Attach Timer & Hose Connectors
Run The Main Line
Connect Driplines & Emitters
Test & Program Timer
Step 1: Plan Your Layout
An important first step is planning how to lay out your drip irrigation system. They’re pretty easy to adjust as you go, but having a general plan ensures you’ll have enough supplies. Important pieces of information are:
Where is my water source?
How many zones do I need on my timer?
Are there any obstacles (decks, sidewalks, fences) I need to plan for?
How many plants am I trying to reach?
Do some plants need more water than others?
What types of emitters do I want?
For reference, here is the space we wanted to water. This is my friend’s yard. He asked for my help installing irrigation to their new herb garden.
And here is a rough map (with key!) of how we laid out his drip system using the materials in the kit (we did buy some extra bubblers too – they’re about $1.50 each). We relied mostly on sprayers and bubblers, and then filled in with drippers for any plants that we felt weren’t getting enough spray.
The kit also includes guides with recommendations for layouts as well as watering times & frequencies.
Step 2: Gather Supplies
Again, purchasing this drip irrigation kit and a hose timer may be all you need to install your system. But here are some situations that may require additional materials:
If you’re creating multiple zones, you’ll need additional hose connectors (backflow preventers, pressure regulators, etc) for each zone.
If your water source is far from your plants, you may need additional coils of 1/2″ tubing and connectors. The kit includes 50 feet.
If you have lots of plants, you may need additional 1/4″ tubing, emitters, or stakes.
Also, you may want/need additional emitters ( the kit includes 20 drippers/stakes, 2 bubblers, and 4 sprayers).
The good news is that most emitters and connectors are very affordable (usually only a few bucks). The most expensive supply will probably be your timer. Our neighbor opted for a a 4-zone timer, which cost $60. More than the irrigation kit itself! But a simple hose timer like this would do the trick well if you’re just adding one zone that you want to water (for example, a side garden or a front landscaping border).
Step 3: Give Your Tubes Some Sun
This sounds silly, but before you begin assembling anything, lay your tubing out in the sun for about an hour. The heat makes the tubes a little more malleable, which will make all of those pressure connections easier on your hands.
This is also a good time to start laying out your emitters, digging any holes or trenches you want to create, or getting started on the next step…
Step 4: Attach Timer & Hose Connectors
As I described in the video, you want to start by connecting the pieces to your spigot or hose bib. This includes your timer, backflow preventer (with filter), pressure regulator, and drip adapter. Screw everything together and hand-tighten it. You can check for leaks once your system is fully attached.
When you’re ready, you can also attach one end of your 1/2″ main line tube to the drip adapter. Depending on your adapter, it should attach with pressure and a small twist.
Step 5: Run The Main Line
Next, run your 1/2″ tubing from your water source to and throughout the main areas that you will be watering. It doesn’t need to run right up against your plants, just within a few feet of them, ideally. Use barbed connectors to split or turn your line as needed. Just push the tube onto the barbed end to connect it.
Be sure to clamp any ends of your main line tube closed with these ring closures. The kit includes 2 of these, so you may need to purchase more if you split your main line in more than 2 directions.
And when it comes time to shorten your main line, just cut off the excess. You can purchase a special tube cutter, but I found household scissors worked fine.
Step 6: Connect Driplines & Emitters
Next, you’ll be connecting driplines (1/4″ tubing) into the side of your main line (1/2″ tubing) near wherever you’ll be placing an emitter. Different types of emitters may require different connections, so don’t start making holes all willy-nilly.
The bubblers and sprayers in this kit came with the correct barbed connectors attached. Just use pressure to puncture them into the side of your main line. The kit did include a tool to help with this, but I didn’t use it much.
For most drippers, you will poke them directly into the main line and then attach your 1/4″ tubing to the other end. If your dripline is quite long, however, it’s recommended that you install the dripper somewhere within the dripline (ideally within 5ft of the plant). Just cut the tube using scissors and attach the dripper between the cut ends, making sure the correct end faces the water source.
Finish off any of these driplines with a tube stake that will keep your water running exactly where you want it.
How To Correct Mistakes
Oops, you poked a hole in the wrong place? Don’t fret! The kit comes with several “goof plugs” which can be used to plug up the end of 1/4″ tubing or any small holes you make in your main line. If the hole is too large for a goof plug, you may need to cut the bad section out and use couplings to install a bit of new hose.
One warning, though. Once you place any barbed end into the 1/4″ tubing, it can be tough to remove. You may just need to cut off the errant piece and use another. Nothing is too complicated though. I made plenty of mistakes and was able to have a great working system by the end of a few hours. Really, you can do this. It’s the opposite of rocket science.
Step 7: Test & Program Timer
Once you have all of your driplines and emitters in place, it’s time to turn on your water and test your system. Use this test run to:
Check for leaks near your hose bib or in any of your lines. Tighten connections to fix any.
Make sure all emitters are dispensing properly. Sprayers and bubblers may need to be twisted open to work.
Refine placements and spray patterns. Make sure water is reaching the places you intended. Adjust bubblers and sprayer heads to change spray distances.
Look for overlap or overspray. Move or adjust spray patterns if areas are getting watered by multiple emitters. Try to limit overspray on sidewalks, driveways, fences, and siding.
Once you are happy with everything, take a moment to program your timer. It is generally better to do 1 or 2 deep waterings a week (versus short daily waterings). Deep waterings that soak the soil encourage stronger, more drought-tolerant roots.
Step 8: Dig In or Mulch Over (Optional)
Lastly, you may choose to dig in or apply a layer of mulch (or soil) atop your hoses. This is optional and purely for aesthetics, although some coverage can protect hoses from damage. Just be warned that burrowing rodents like moles may chew through buried lines looking for water. And buried lines may be harder to spot leaks in and repair. So in most cases, a thin layer of mulch is a good compromise.
More Garden DIY Projects
Want more ideas to upgrade or maintain your outdoor areas? Here are some other posts you might enjoy:
*This post contains affiliate links, so we may earn a small commission when you make a purchase through links on our site at no additional cost to you.
Once again, the annual Color of the Year announcements have started rolling out VERY early. And once again, one has already come out before we could make our official guesses (it’s only August of 2026!). So we quickly made our picks this morning (Sherry just chose two she has been hoping would be chosen for many years). You can see them below in this post, and just like we’ve done for 2024, 2025, and 2026 – we’ll update this post every time a new one is announced so you can see all the COTY selections in one convenient place.
While color forecasting and design trends are serious business for these companies, we mostly enjoy the fun of guessing what will be picked and how people react to the choices. People were big mad at Pantone last year! You can see our predictions for this year at the bottom of this post.
What is the 2027 Color of the Year?
Each year, most major paint and color brands announce their “color of the year,” which is usually meant to encapsulate current or future design trends. So rather than having one official Color of the Year, you’ll see many selections from folks like Benjamin Moore, Sherwin-Williams, and Pantone. Some companies will also announce color collections or entire palettes. They act as commentary on both design trends and the world at large, while also helping laypeople pick trending hues. And of course, it’s all a good marketing gimmick or PR stunt for these brands… one we’re suckers for every year!
What Were Last Year’s Colors?
You can see a snapshot of the last 3 years’ COTY picks below, and find more details about each here: 2024 – 2025 – 2026.
Looking at them all together like this really gives you a sense of an overall trend for that year, as well as how things are shifting across time. 2025 was notably darker and more muted than 2024, with brands going heavy on deep browns and purples. 2026 saw more variety in the hues, but things were still fairly muted and neutral (we always hope for more color than the last two years have given us).
Every 2027 Color of the Year
We are tracking 14 brands this year, but are always on the lookout for others. As of August 14, 2026, only one has announced their 2027 Color of the Year. We’ll keep this list updated as more of them roll out.
Here’s a closer look at each color selected.
Valspar’s 2027 Color of the Year
Valspar kicked off this year’s COTY announcements with a steely blue called Cottage Door. They describe it as a “trans-seasonal color” for “thoughtful and introspective spaces,” which is a response to a cultural shift they see towards intentional, authentic, and heartfelt living. They suggest pairing it with a creamy pink and warm gray, as well as natural textures and playful patterns.
This is Valspar’s fourth year picking a Color of the Year, and you can see above that they love a blue. All of the choices are solid and reliable, but it will be interesting to see if they surprise us in 2028.
Our 2027 Color of the Year Predictions
Every year, Sherry and I like to guess 3 colors we think will show up on the list. It’s all in good fun, and you can tell below that we’re both hoping for a return to more color. In full disclosure, I saw the Valspar announcement before making my picks, but I kept Sherry in the dark so she could make her selections 100% blind.
We will update this graphic if any of our guesses are close.
More Paint Posts
If we want to see more of our favorite colors or nerd out on paint colors with us, be sure to check out these other posts below:
Search for a Murphy bed, and you’ll quickly encounter everything from a do-it-yourself Murphy bed kit to fully custom cabinetry designed around a wall-bed mechanism. The right approach depends on how much customization the room requires and how the Murphy bed fits into the renovation.
A Murphy bed kit typically provides the hardware or mechanism needed for the folding bed system. Depending on the product and project, the enclosure and surrounding finishes may be handled separately.
A custom Murphy bed gives the design more flexibility. A contractor or millworker can coordinate the enclosure with surrounding closets, shelves, panels, cabinetry, or other built-ins so the entire wall is considered together.
A built-in Murphy bed can be particularly useful when storage is part of the reason you’re renovating. Instead of viewing the bed and cabinetry as separate elements, the layout can account for both from the beginning.
Sweeten homeowner Matthew took a combination approach during his Clinton Hill renovation. He purchased a Murphy bed kit online, while his contractor built the frame, custom panels, and installed the system as part of the room’s millwork.
This is also where finding the rightremodeling contractor can matter. If the project includes custom millwork, wall changes, electrical work, or several rooms being renovated at once, the Murphy bed needs to be coordinated with the rest of that scope.
Renovate expertly with Sweeten
Sweeten brings homeowners an exceptional renovation experience by personally matching trusted general contractors to your project, while offering expert guidance and support—at no cost to you.
Understanding Load-Bearing Walls: Importance and Management
Home construction and renovation projects often invoke a myriad of technical terms that can bewilder even the most seasoned DIY enthusiasts. Among these, the term “load-bearing wall” stands out due to its critical role in structural integrity. Understanding what load-bearing walls are, how they function, and how to manage them during a renovation is vital for any homeowner or builder.
What is a Load-Bearing Wall?
A load-bearing wall is a structural component in a building designed to support weight from the floors, roof, or other parts of the structure above it. These walls transfer the load down to the foundation, playing a crucial role in maintaining the integrity of the building. If modifications are made—such as removing or altering a load-bearing wall—it can severely impact the structural stability of a home, potentially leading to catastrophic failure.
Identifying Load-Bearing Walls
One of the most critical aspects of home renovations is identifying which walls are load-bearing. Below are some key indicators to help you determine if a wall is load-bearing:
Location: Load-bearing walls are usually found in the center of a home, parallel to the roof trusses or floor joists.
Thickness: Load-bearing walls are generally thicker than non-load-bearing walls, often made of solid materials like brick or concrete.
Continuous Structure: If the wall continues to a floor above, there’s a high likelihood it’s load-bearing.
Floor Joists Orientation: If the floor joists are perpendicular to a wall, that wall may be load-bearing.
The Importance of Load-Bearing Walls
Load-bearing walls are essential for several reasons:
Structural Support: They provide necessary support for the entire structure, ensuring the distribution of weight is managed safely.
Durability: Properly maintained load-bearing walls contribute to the longevity of a building.
Risk Mitigation: Understanding and preserving load-bearing walls minimizes the risk of significant structural damage during renovations.
What Happens When You Remove a Load-Bearing Wall?
Removing a load-bearing wall without implementing an alternative support system can lead to severe consequences, including:
Structural Collapse: The most immediate risk is the potential for the structure to sag or collapse.
Uneven Load Distribution: Removing a load-bearing wall can disrupt the distribution of weight, causing stress on other structural components.
Warning Signs: Issues such as cracks in the walls or ceiling may manifest due to the unbalanced load.
Alternatives to Removing Load-Bearing Walls
For homeowners aiming to create open spaces, there are alternatives to completely removing load-bearing walls:
Install Load-Bearing Beams: A steel or wooden beam can replace the load-bearing wall while redistributing weight safely.
Use Columns or Posts: These elements can provide adequate support and allow for larger openings.
Open Concept Designs: Consider redesigning with an open concept approach that strategically uses existing load-bearing walls.
Cost Considerations
Managing load-bearing walls during renovations is not just about structural safety; it involves financial planning too. The average costs associated with modifying or reinforcing load-bearing walls vary significantly based on several factors, including:
Location of the wall and its complexity
Materials used for creating beams or additional support
Labor costs for construction professionals
Comparison of Costs for Different Support Options
Support Option
Estimated Cost
Pros
Cons
Removing Load-Bearing Wall
$2,000-$10,000 (including beam installation)
Creates open space
Risk of structural collapse if not done correctly
Retrofitting with Beams
$1,500-$5,000
Safe and effective weight distribution
Can be labor-intensive
Using Columns
$1,000-$4,000
Preserves wall integrity
May block visual lines
Conclusion
In summary, understanding load-bearing walls is essential for any homeowner considering renovations. These walls play a critical role in ensuring a home’s structural integrity. If you are unsure whether a wall is load-bearing, consulting with a structural engineer or qualified contractor is advisable before making any modifications. Ultimately, careful planning and execution of changes will ensure a safe, beautiful living space. Whether you’re looking to create an open floor plan or just want to update your interiors, navigating the complexities of load-bearing walls is a crucial step in the renovation process.
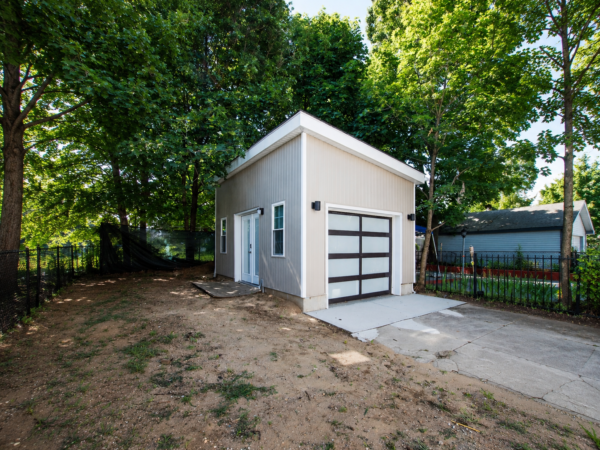












![A Mid-Renovation Update (And Video Tour!)[/gpt3]](https://housefixjournal.site/wp-content/uploads/2026/07/MidReno-OpenWallView.jpg)
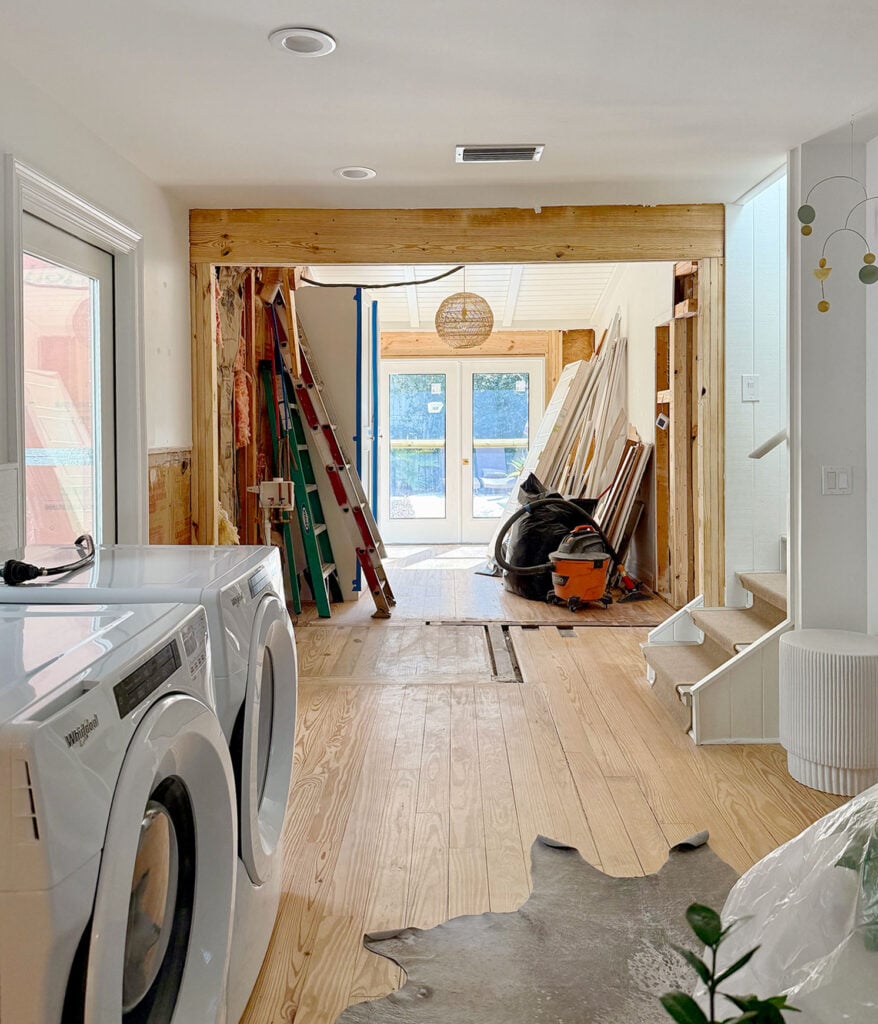
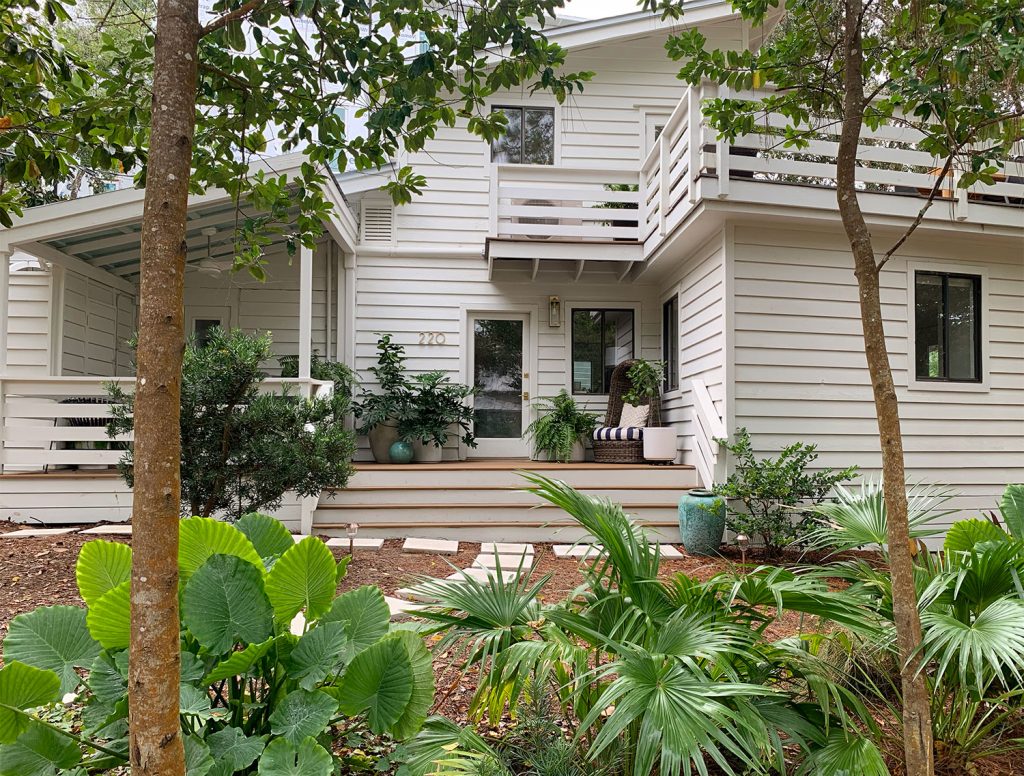
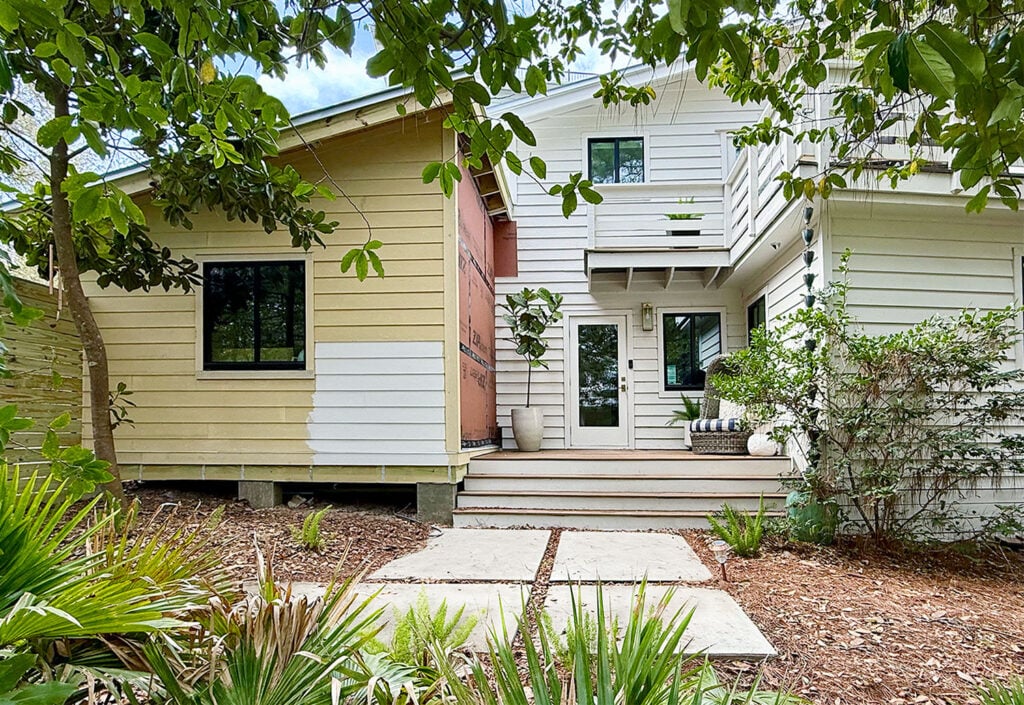
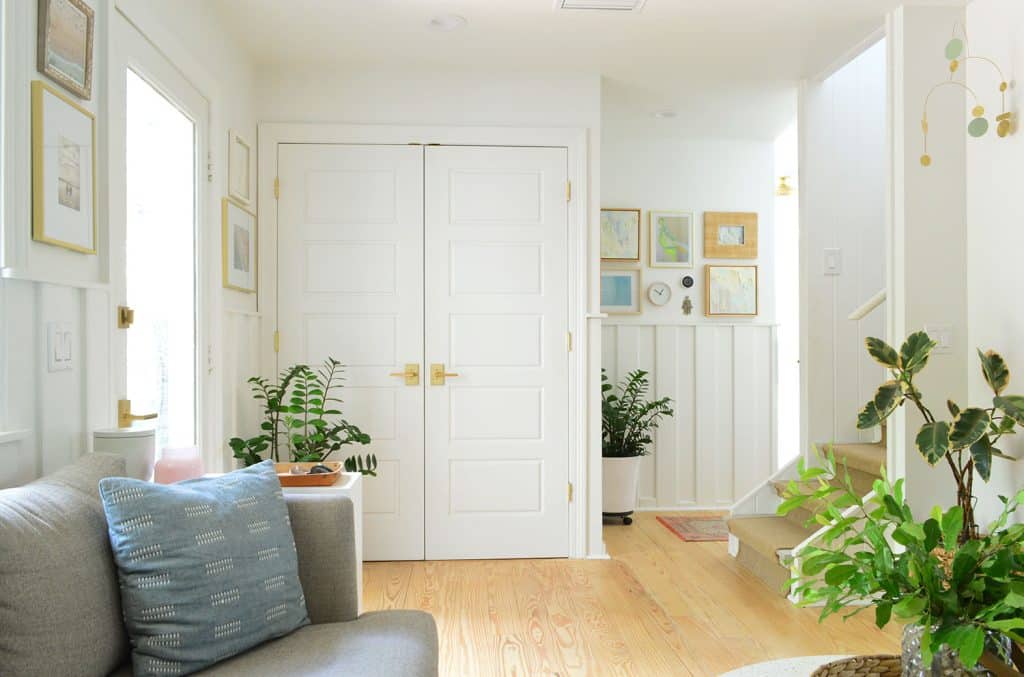
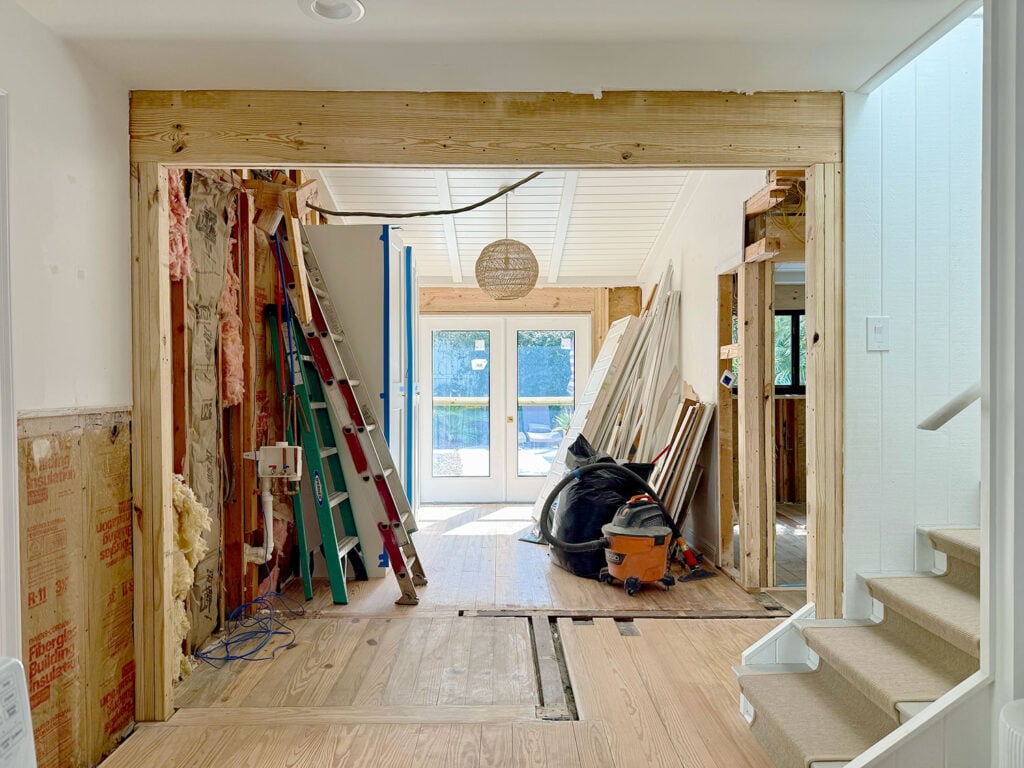
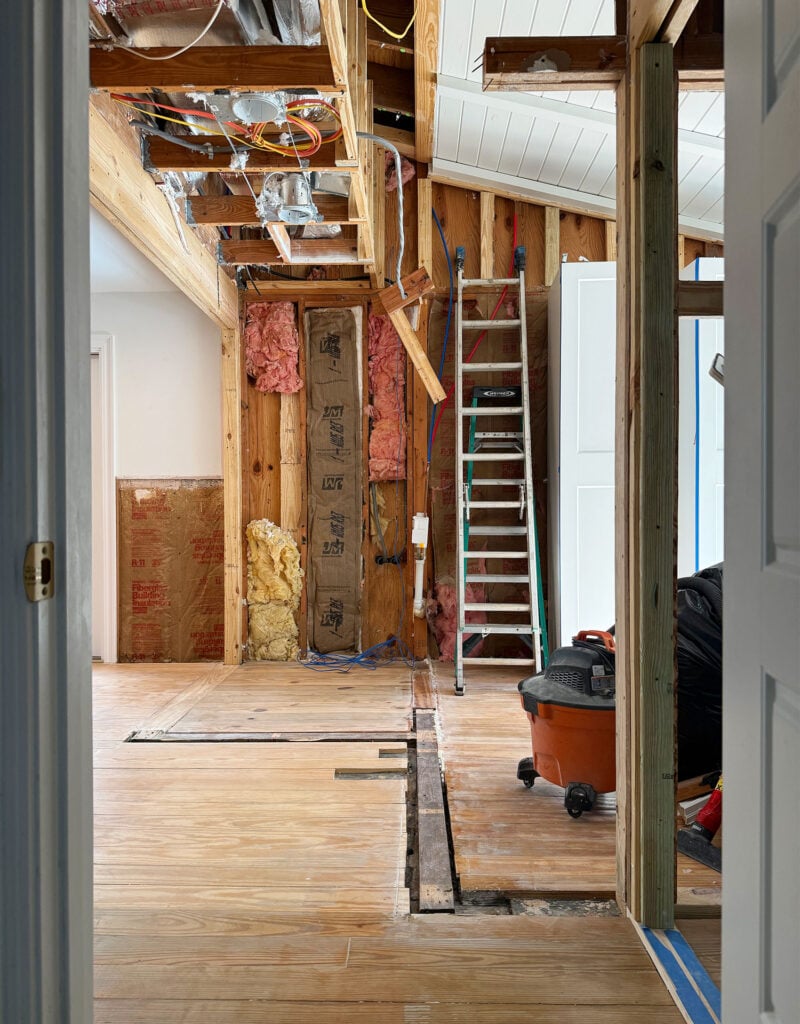
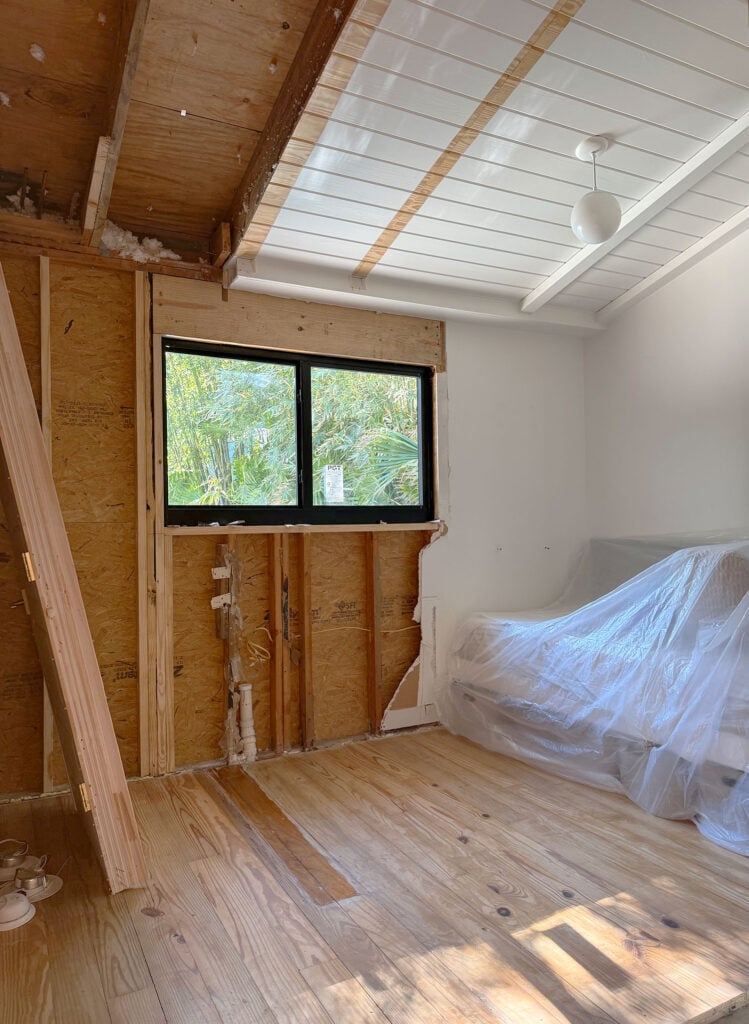
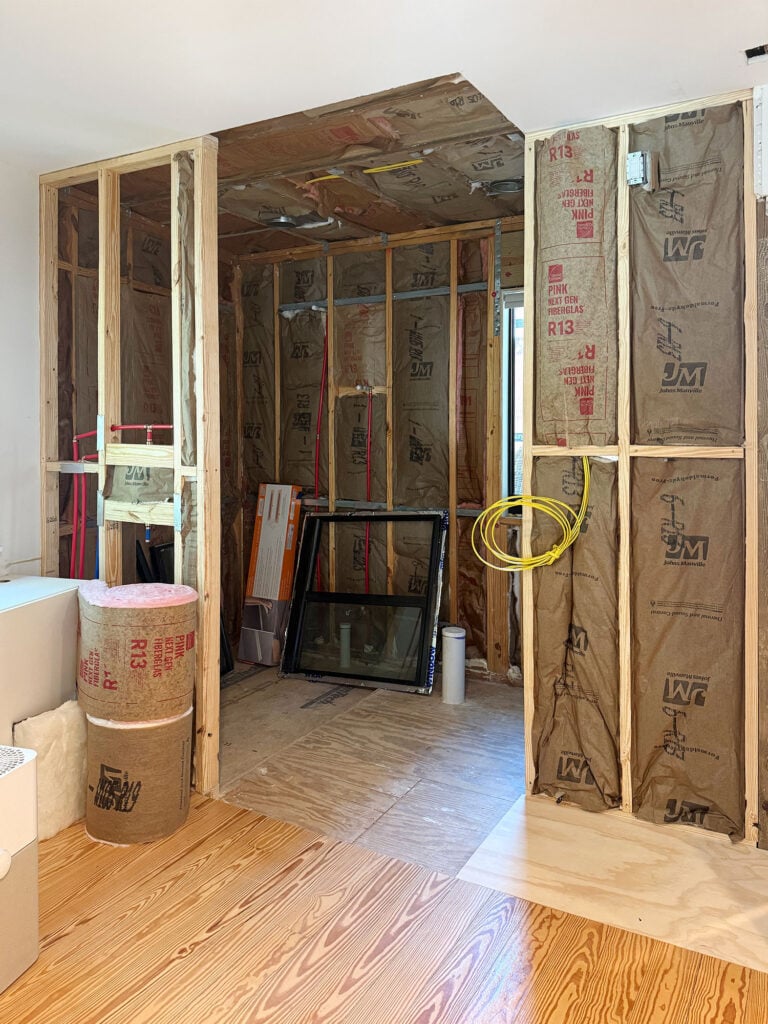
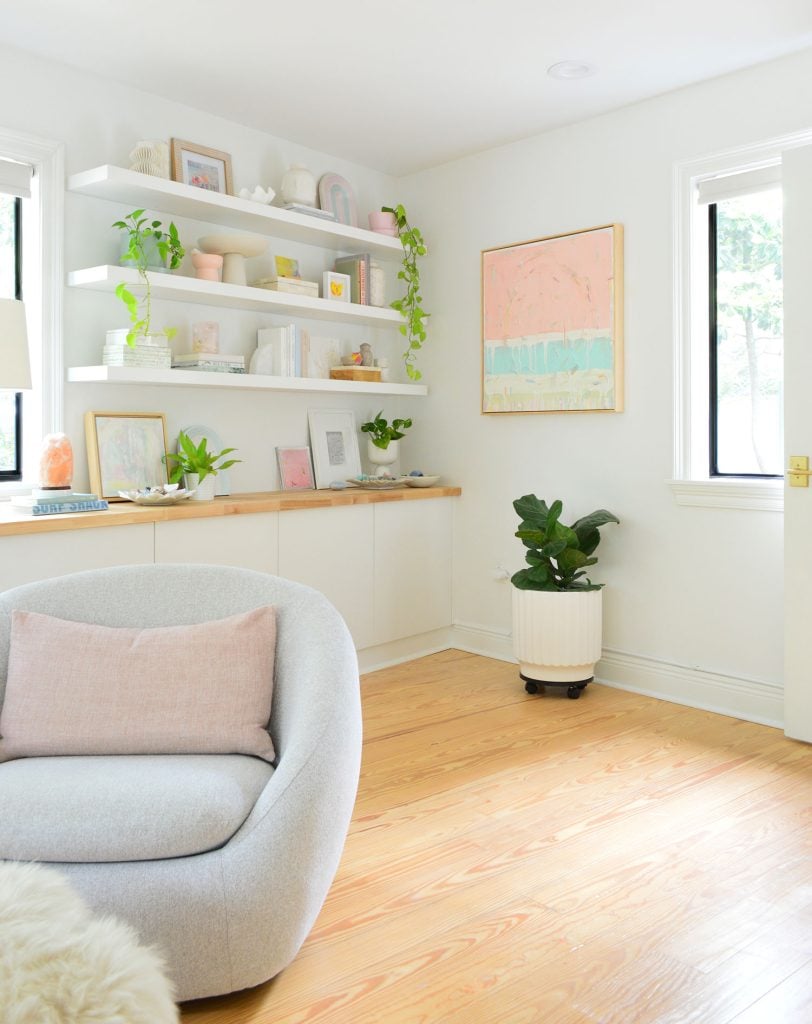
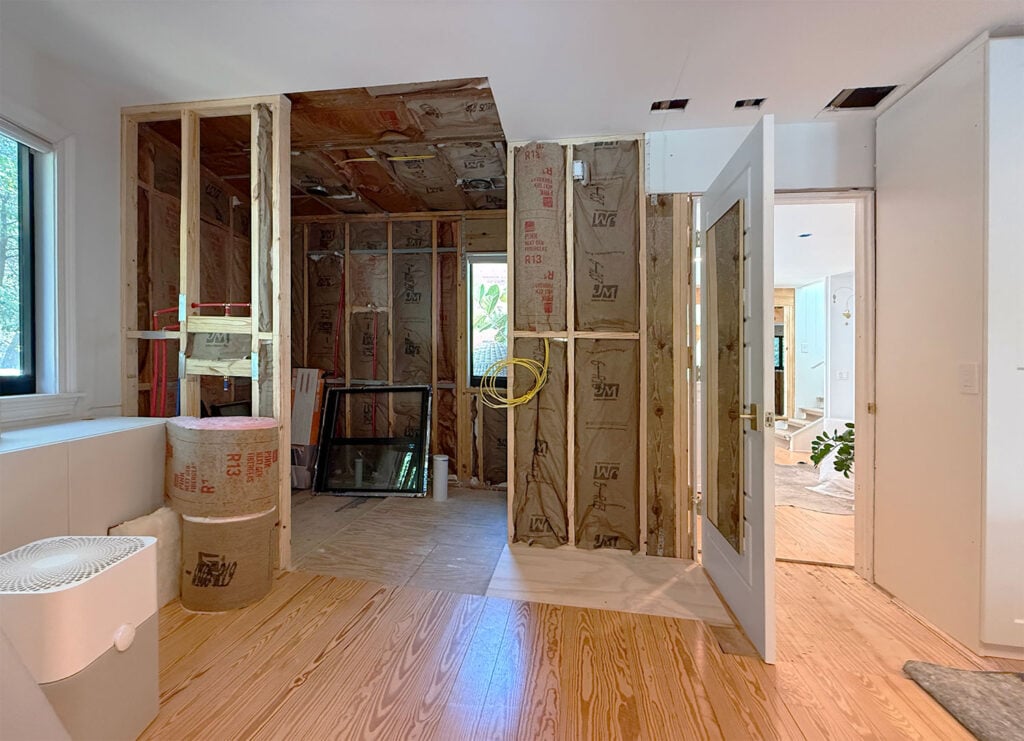
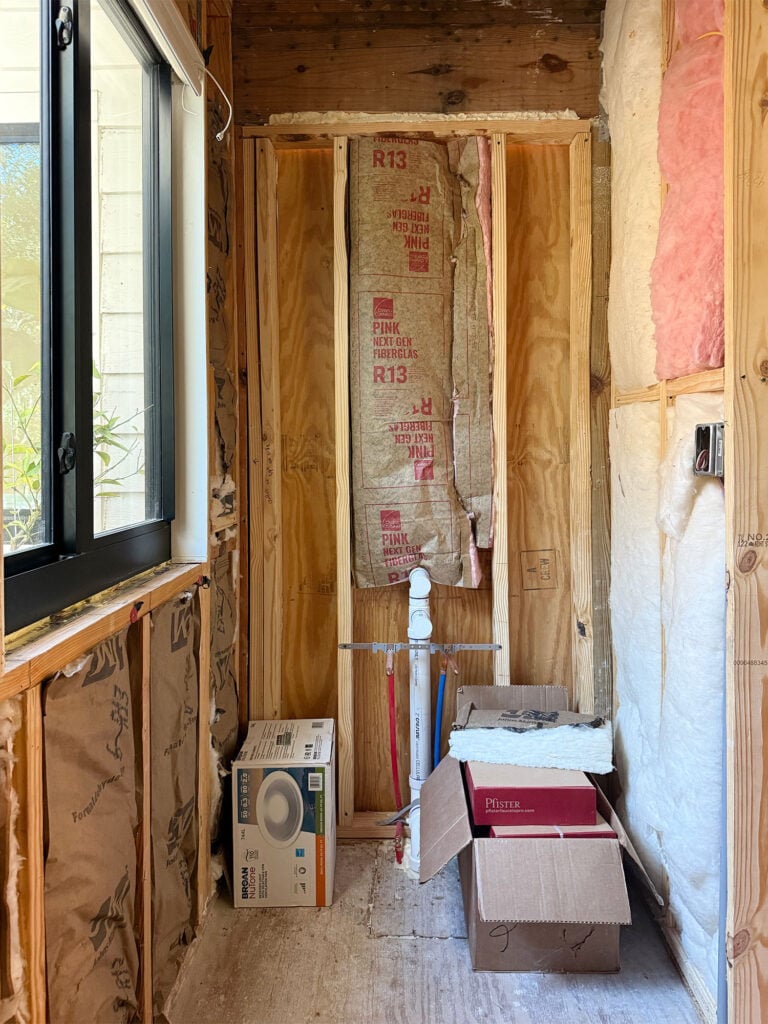
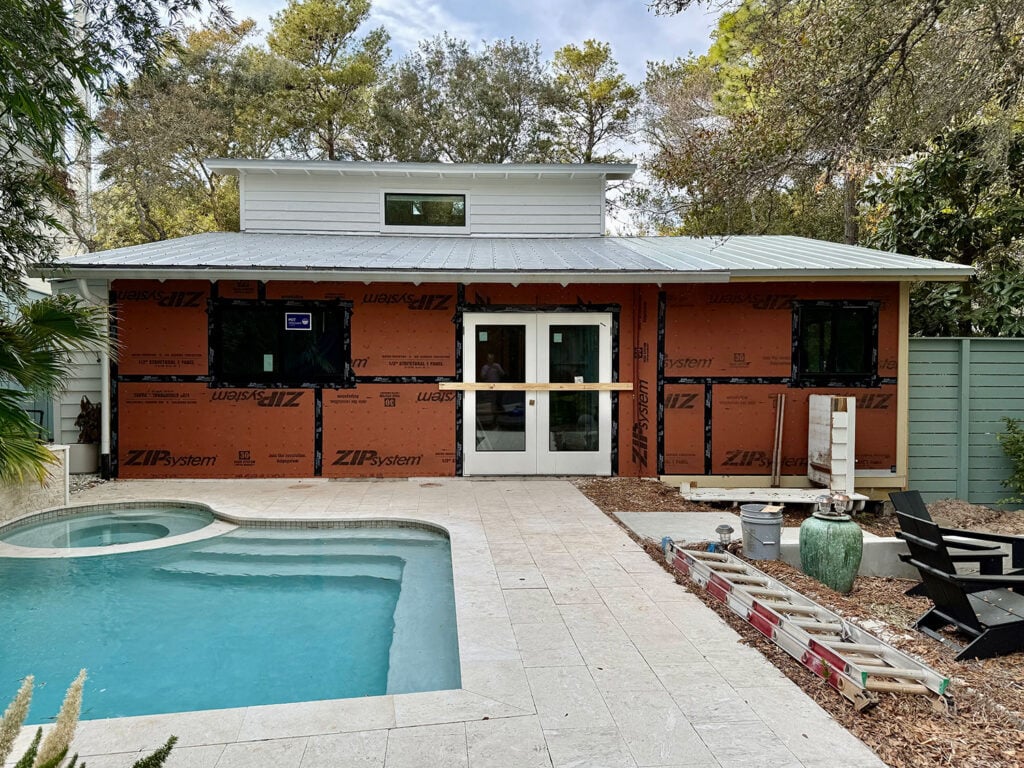
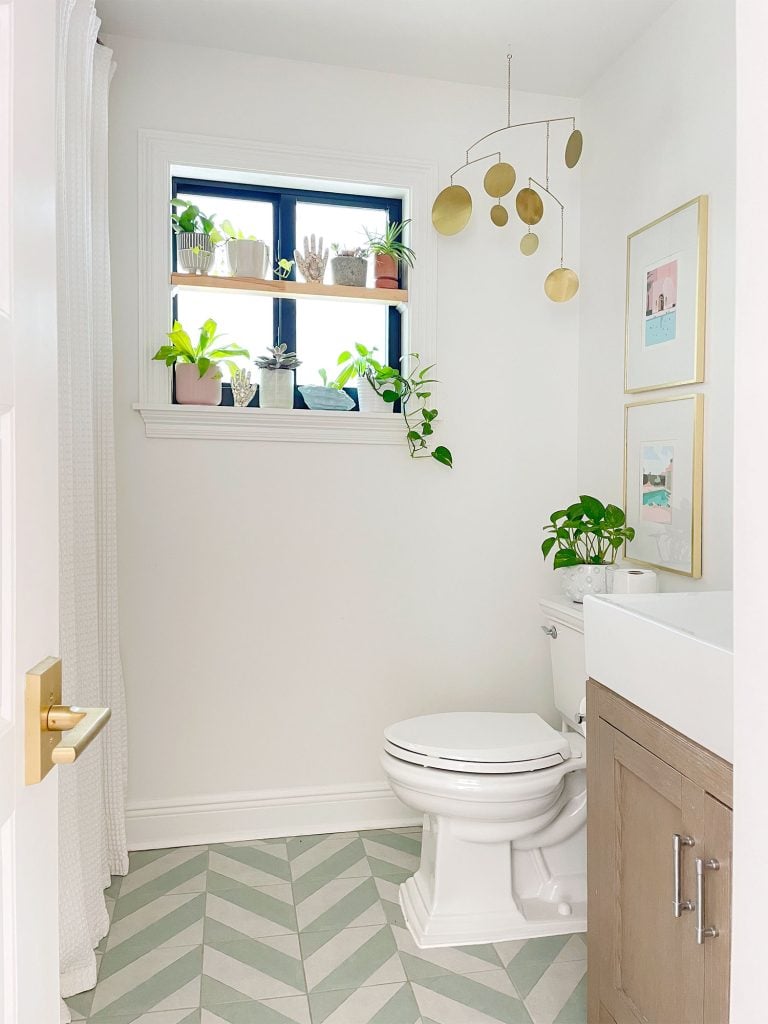

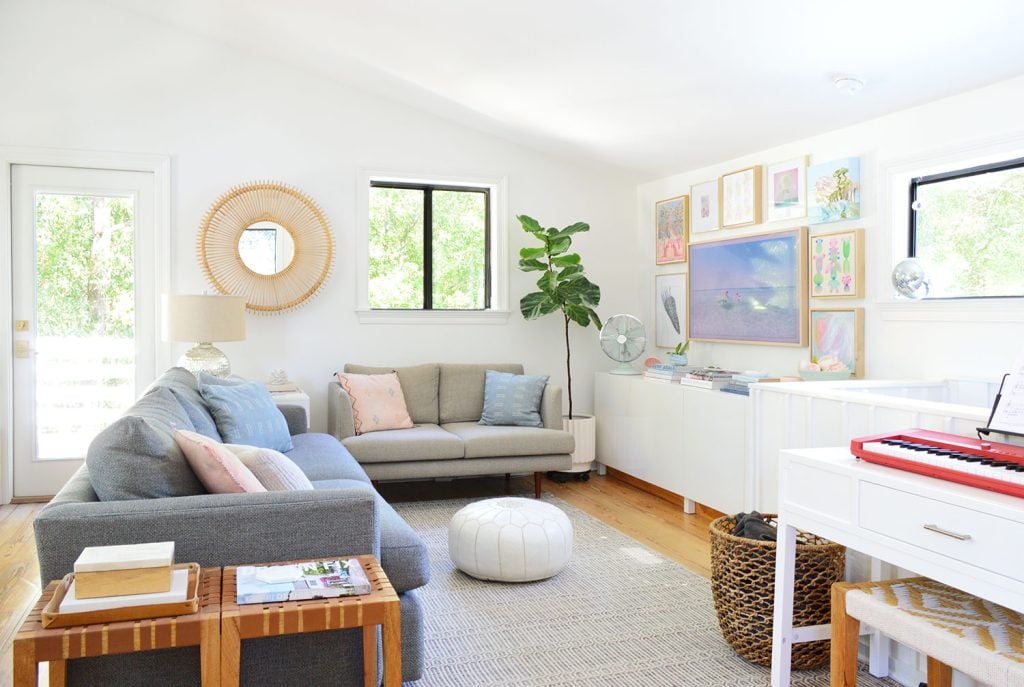
![Our 7 Favorite Things To Do In Pigeon Forge & Gatlinburg[/gpt3]](https://housefixjournal.site/wp-content/uploads/2026/07/Dollywood-Pigeon-Forge-Gatlinburg-Vacation-Featured.jpg)




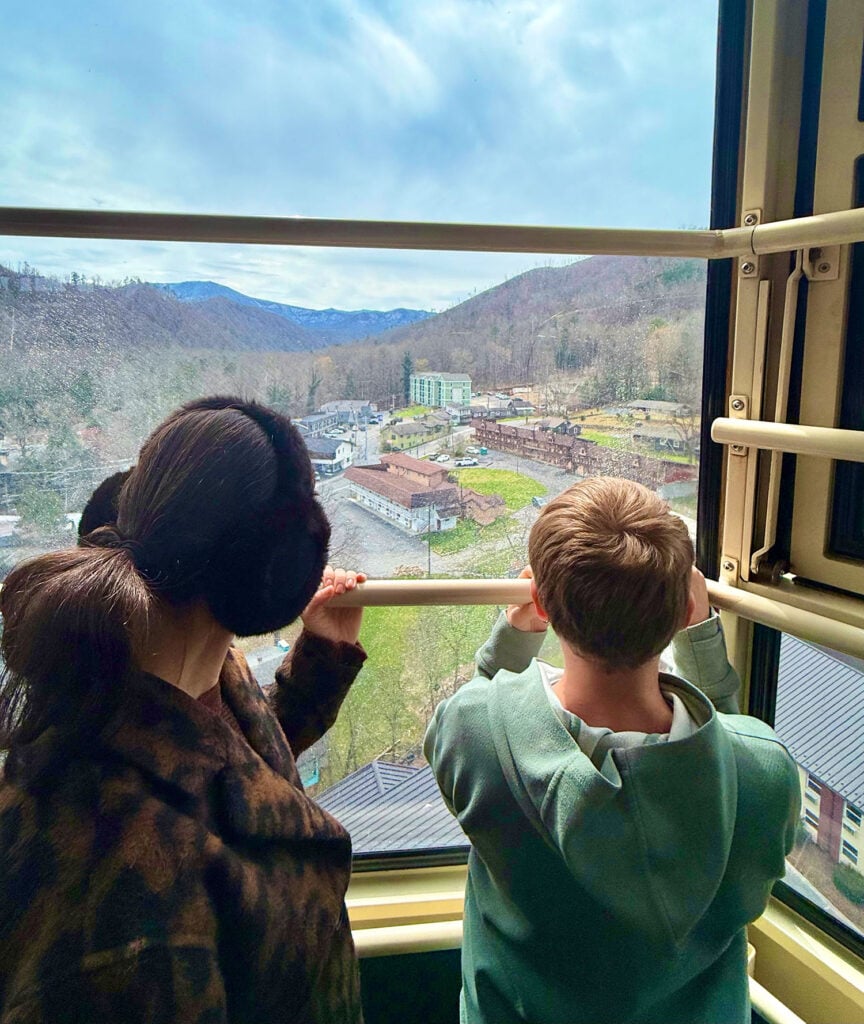







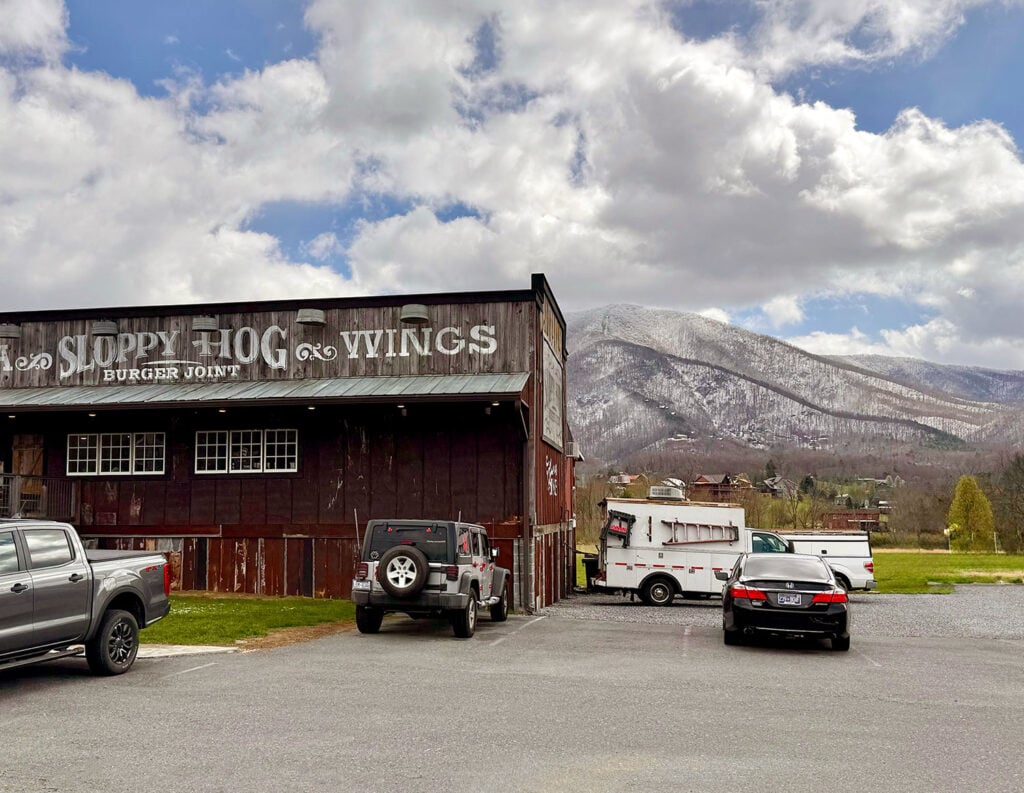
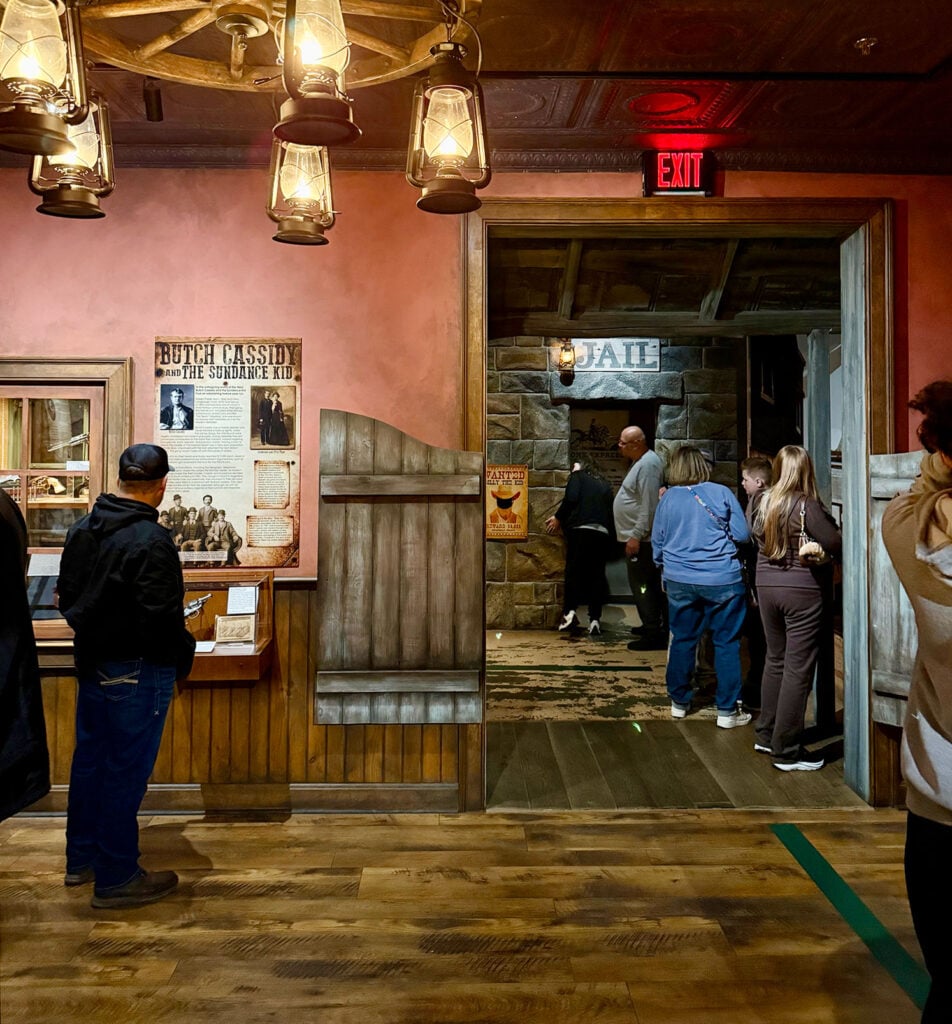

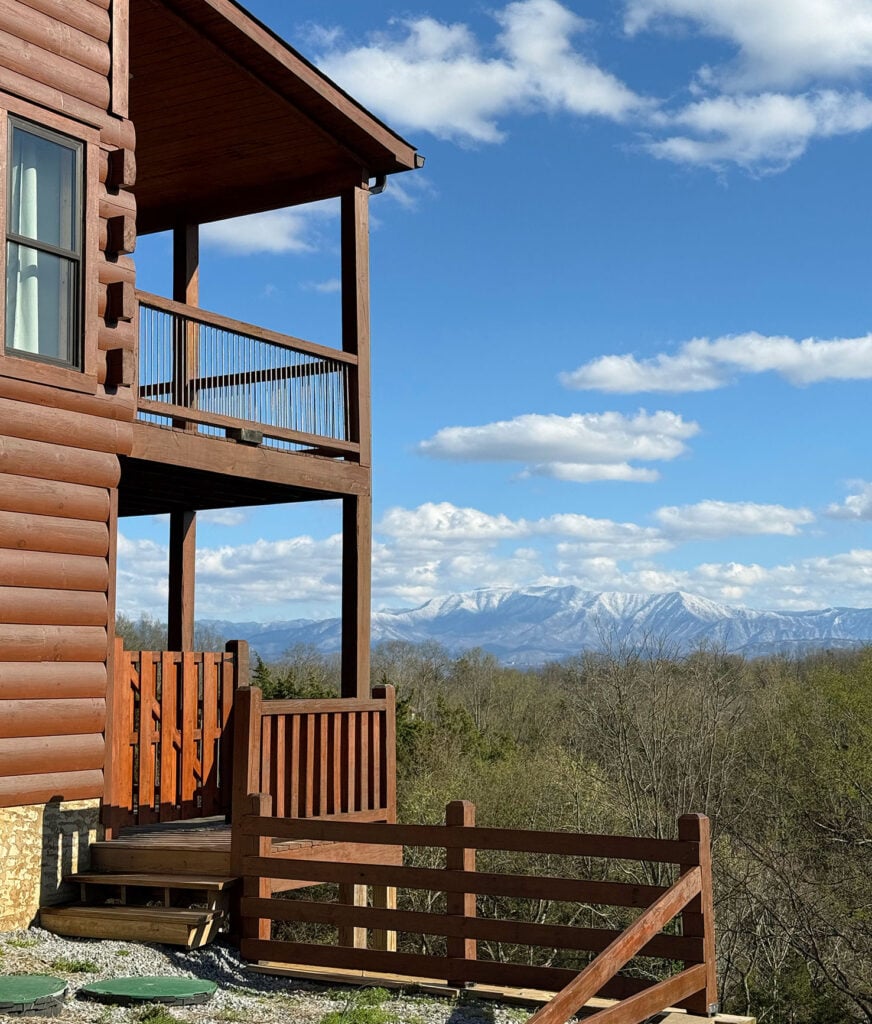
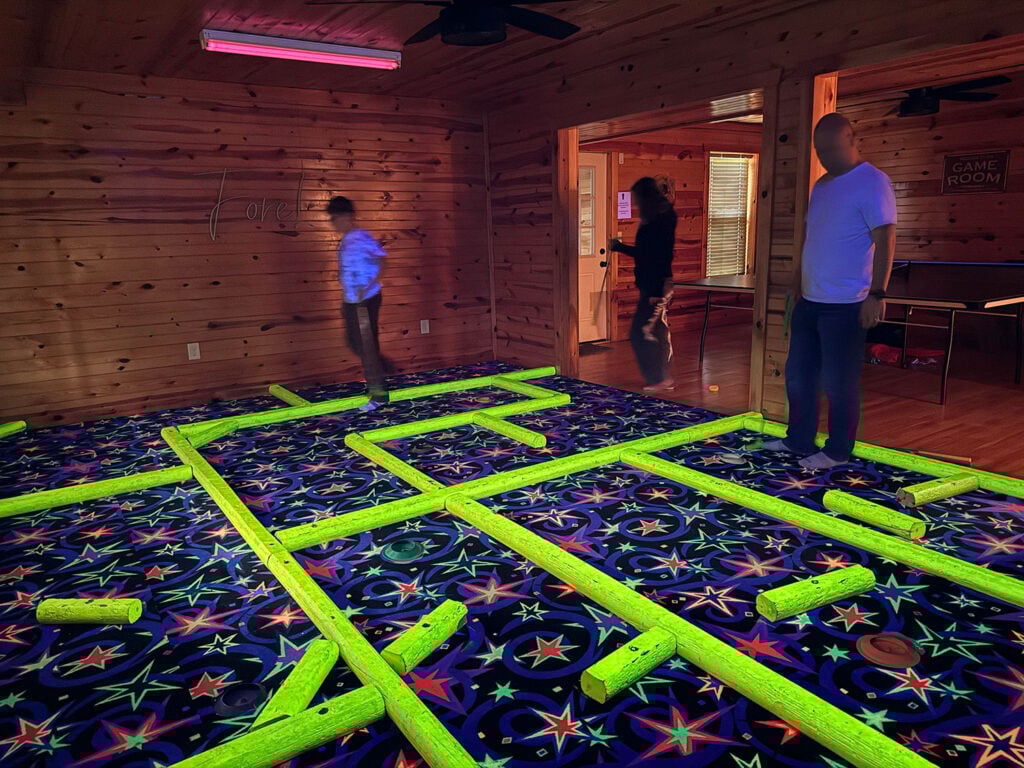
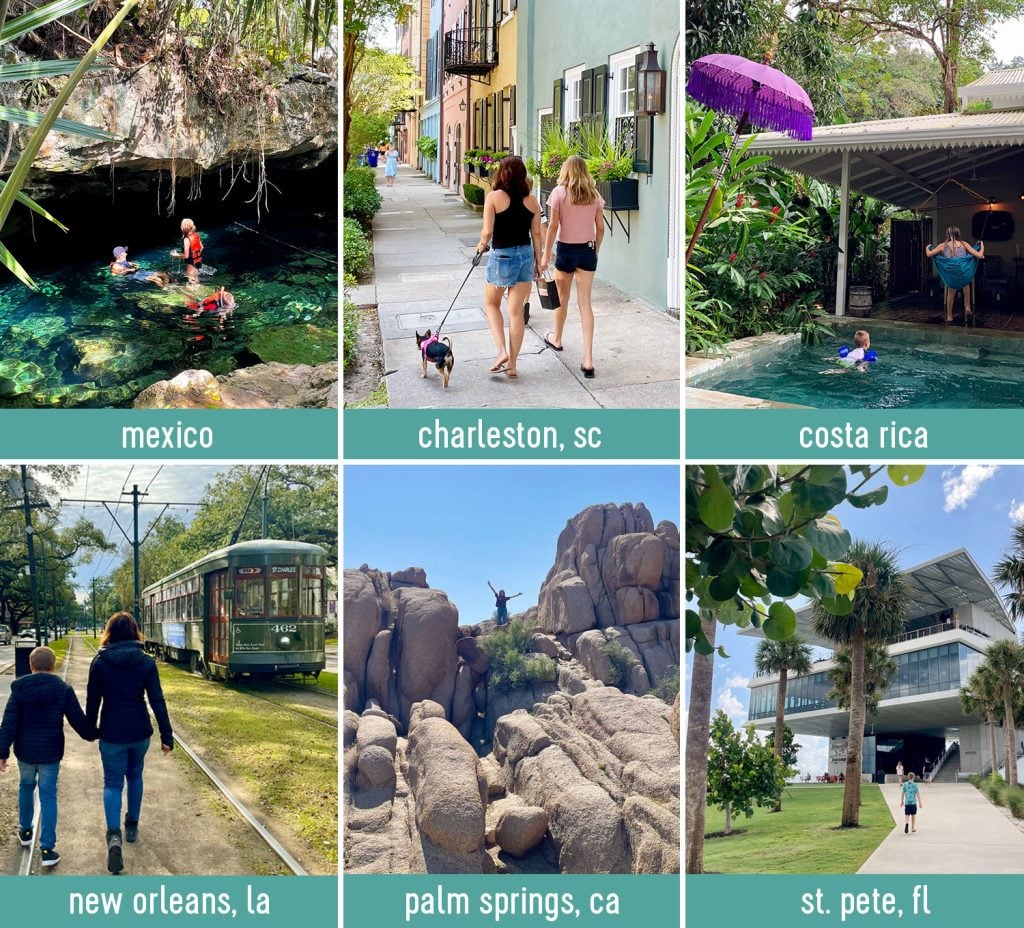
![100+ Gender Neutral Baby Names[/gpt3]](https://housefixjournal.site/wp-content/uploads/2026/07/Gender-Neutral-Baby-Names.jpg)


![How To Propagate A Pothos[/gpt3]](https://housefixjournal.site/wp-content/uploads/2026/07/Propagate-Pothos-Clipping-In-Glass-Jar.jpg)
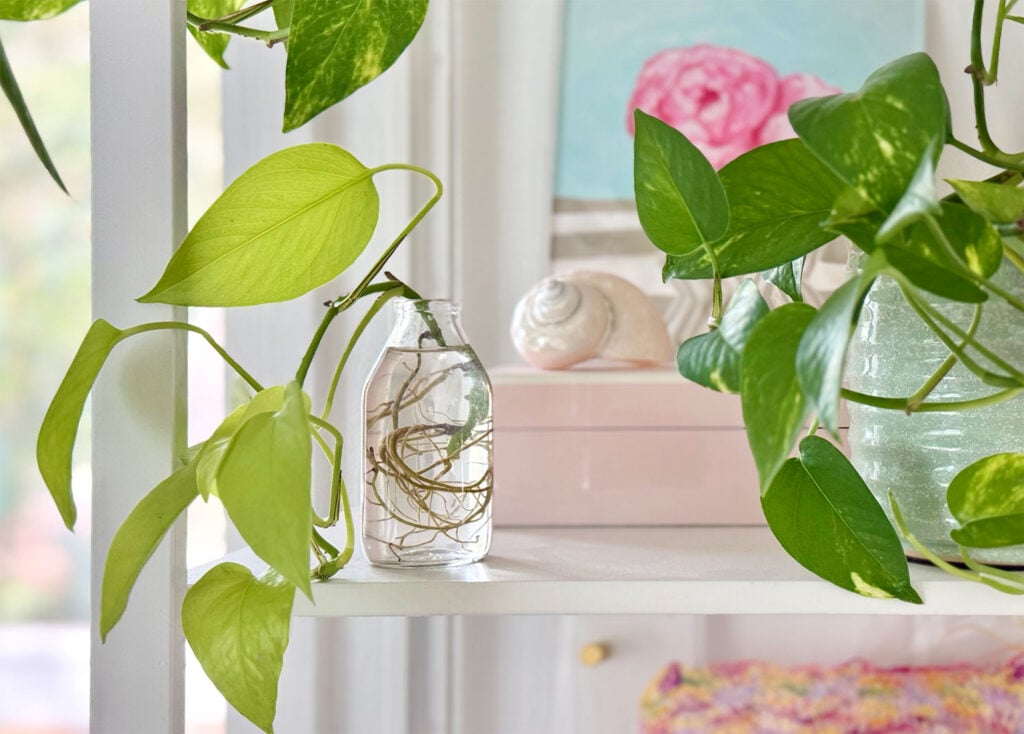
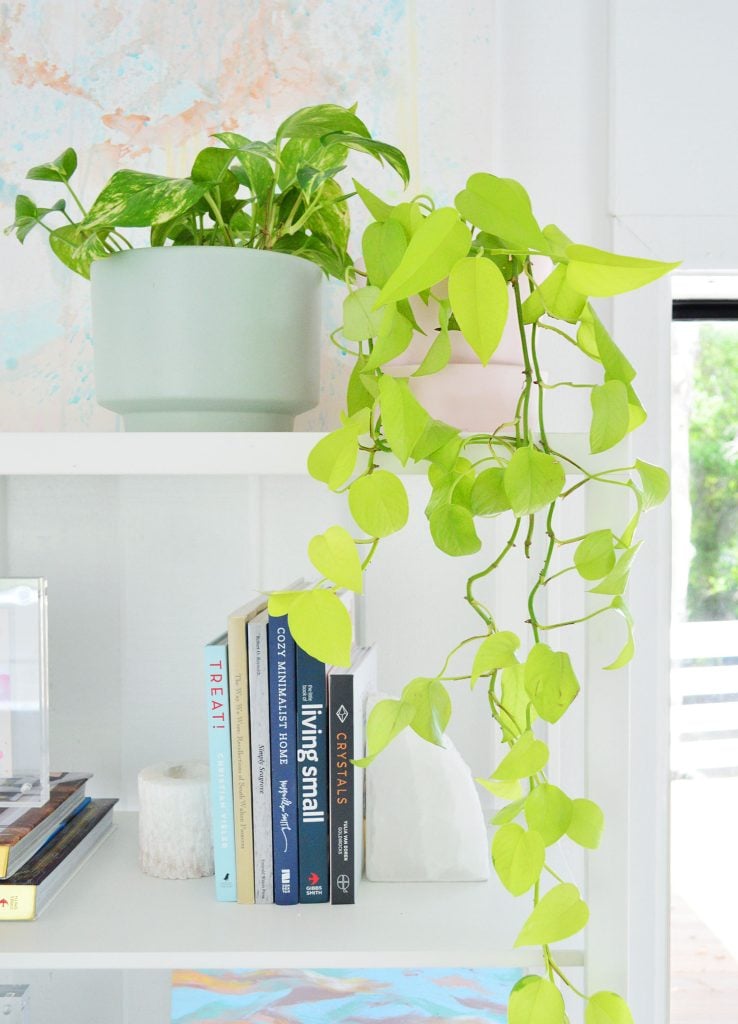
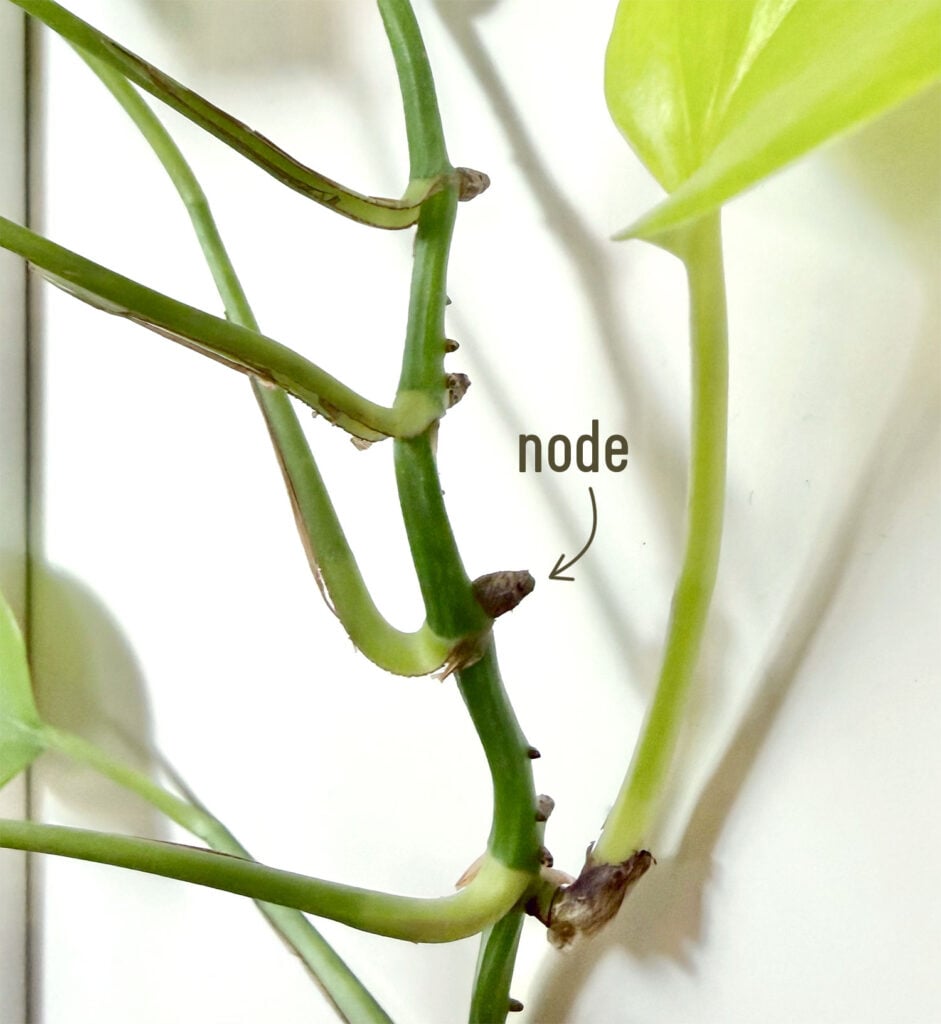
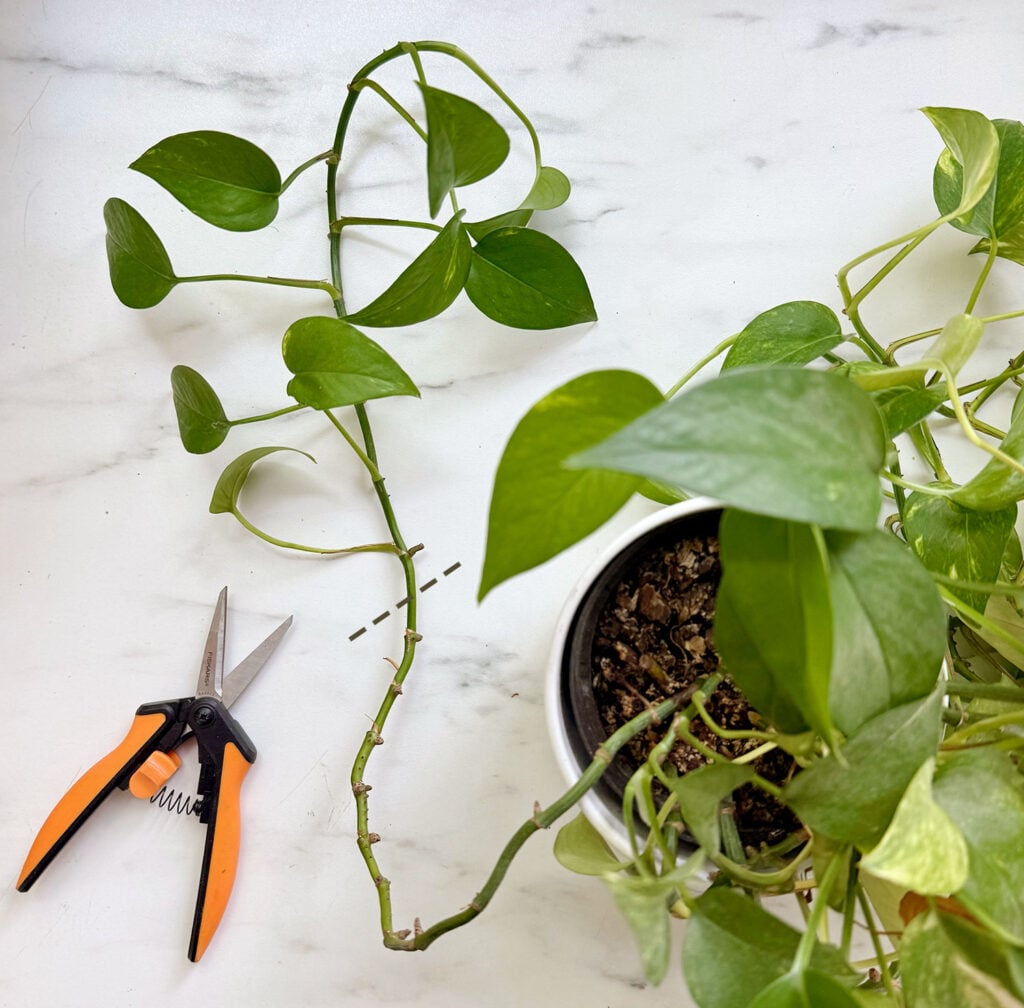
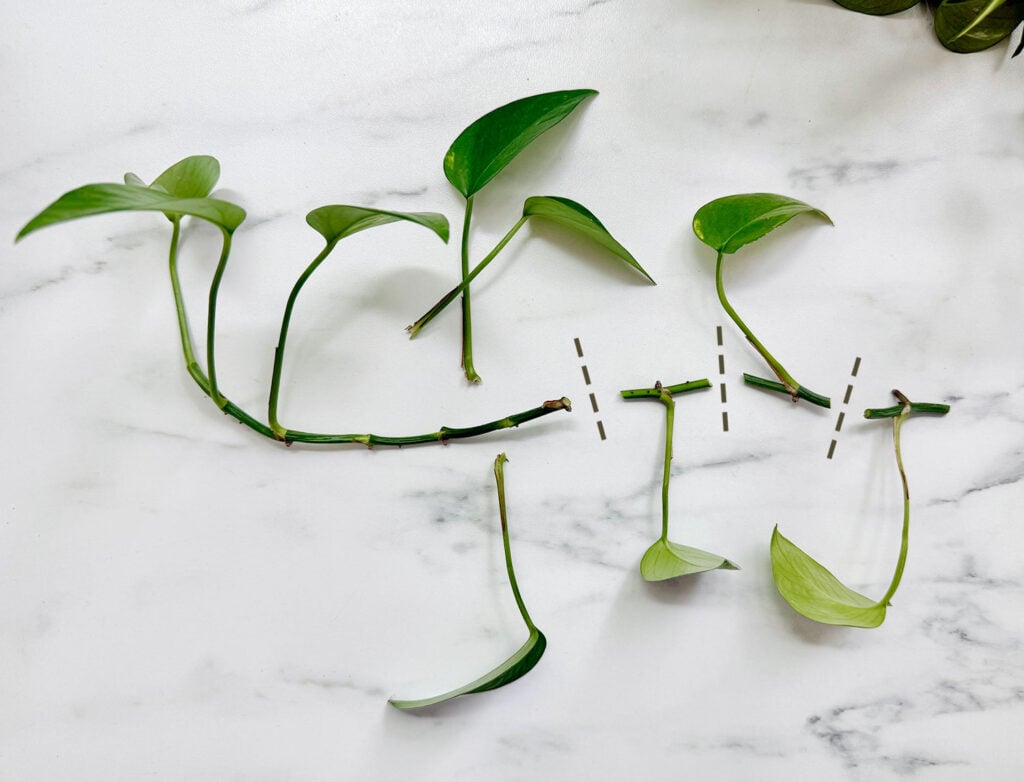

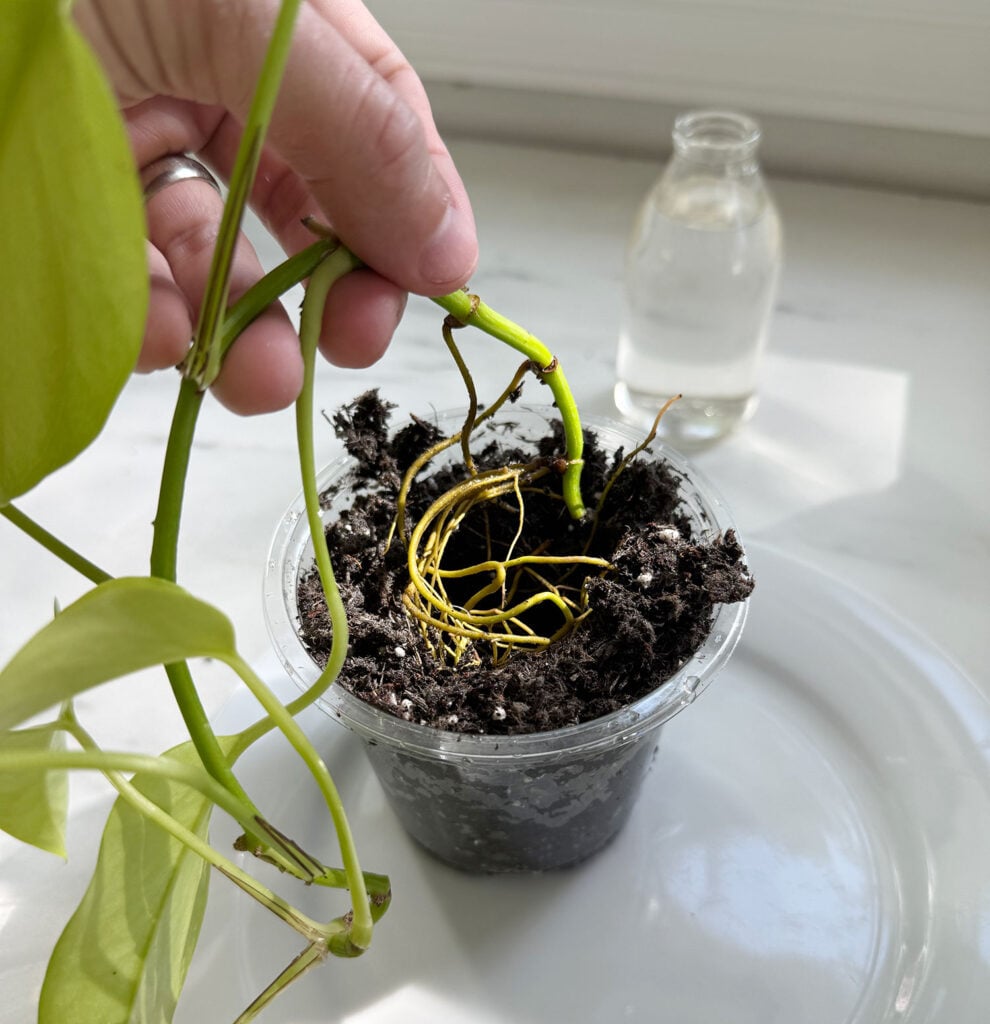
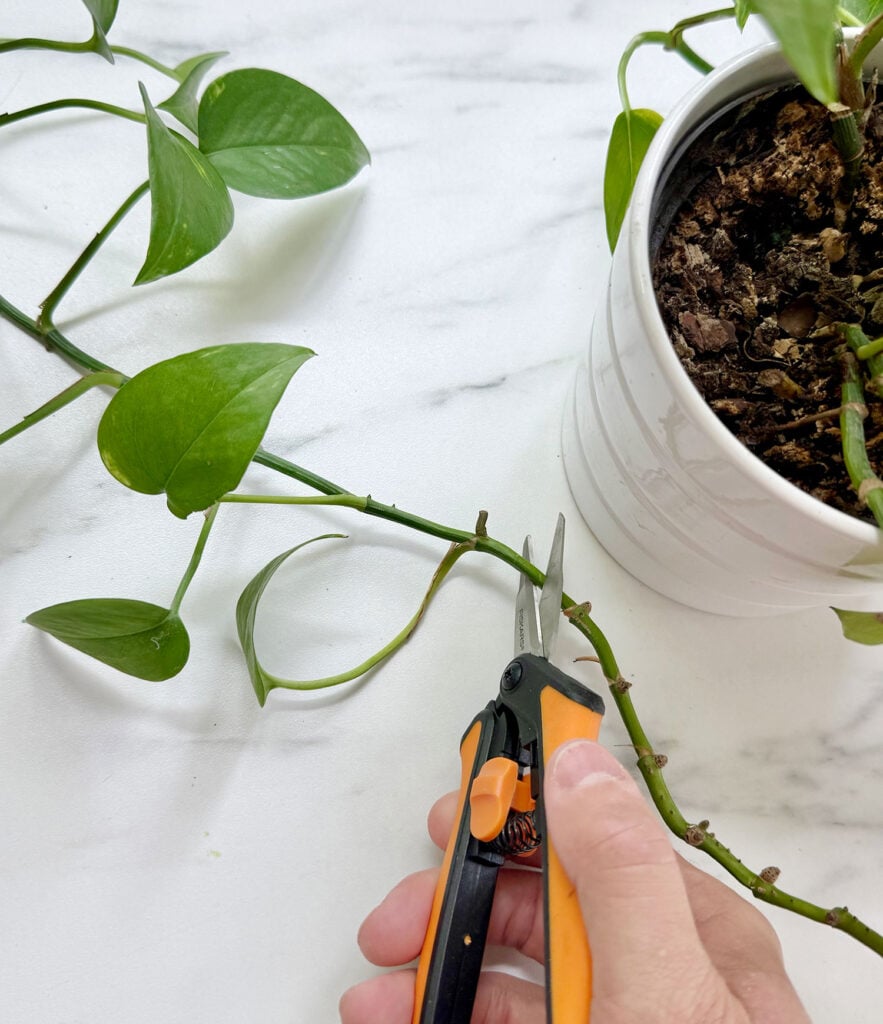
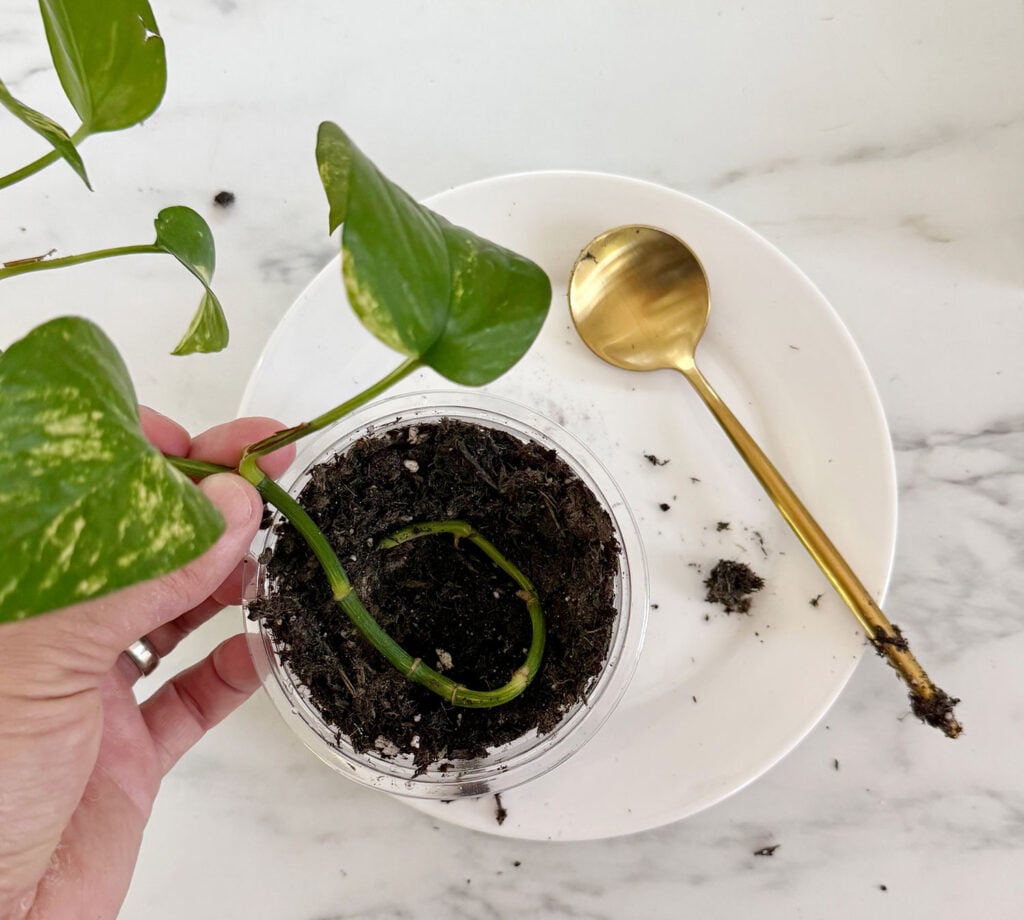
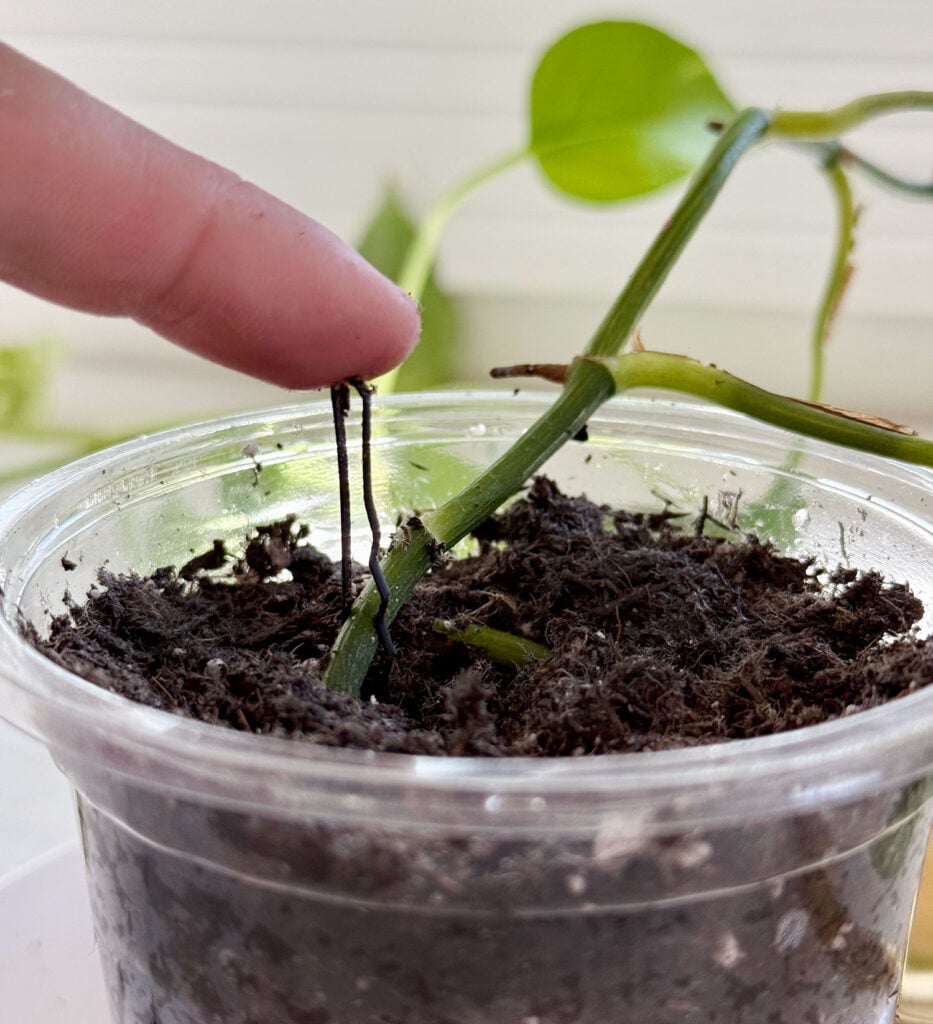
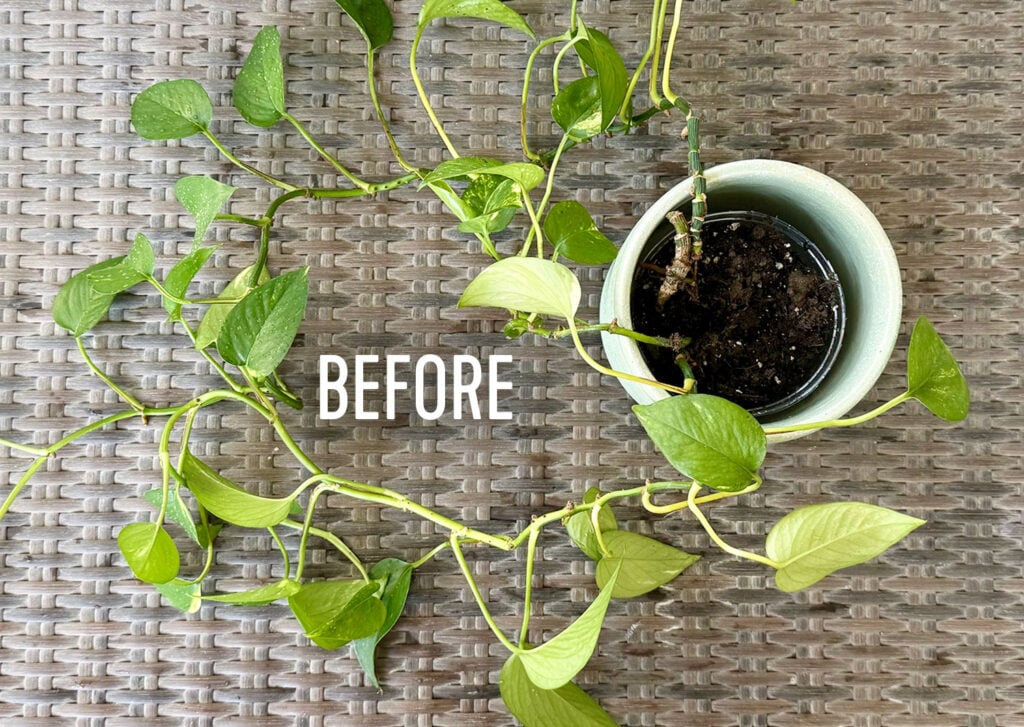
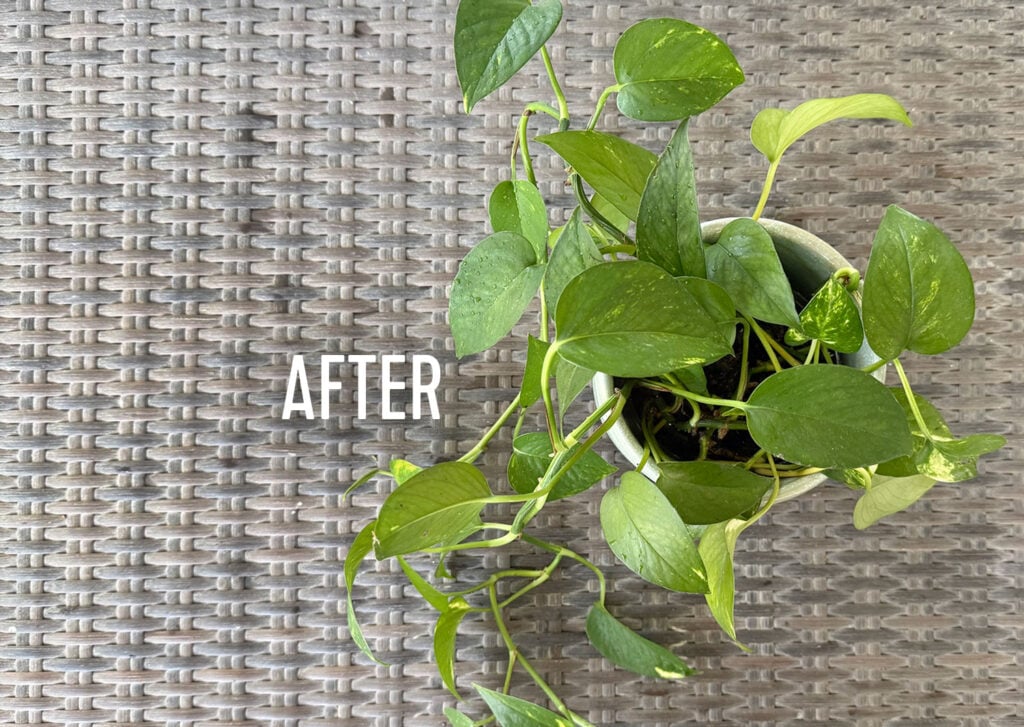
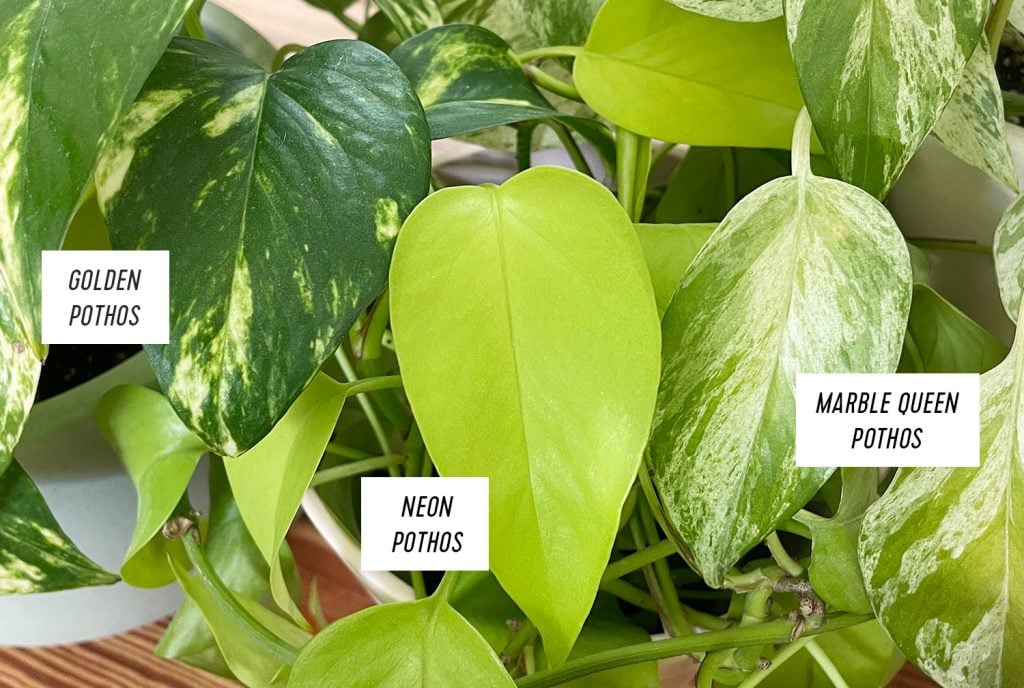
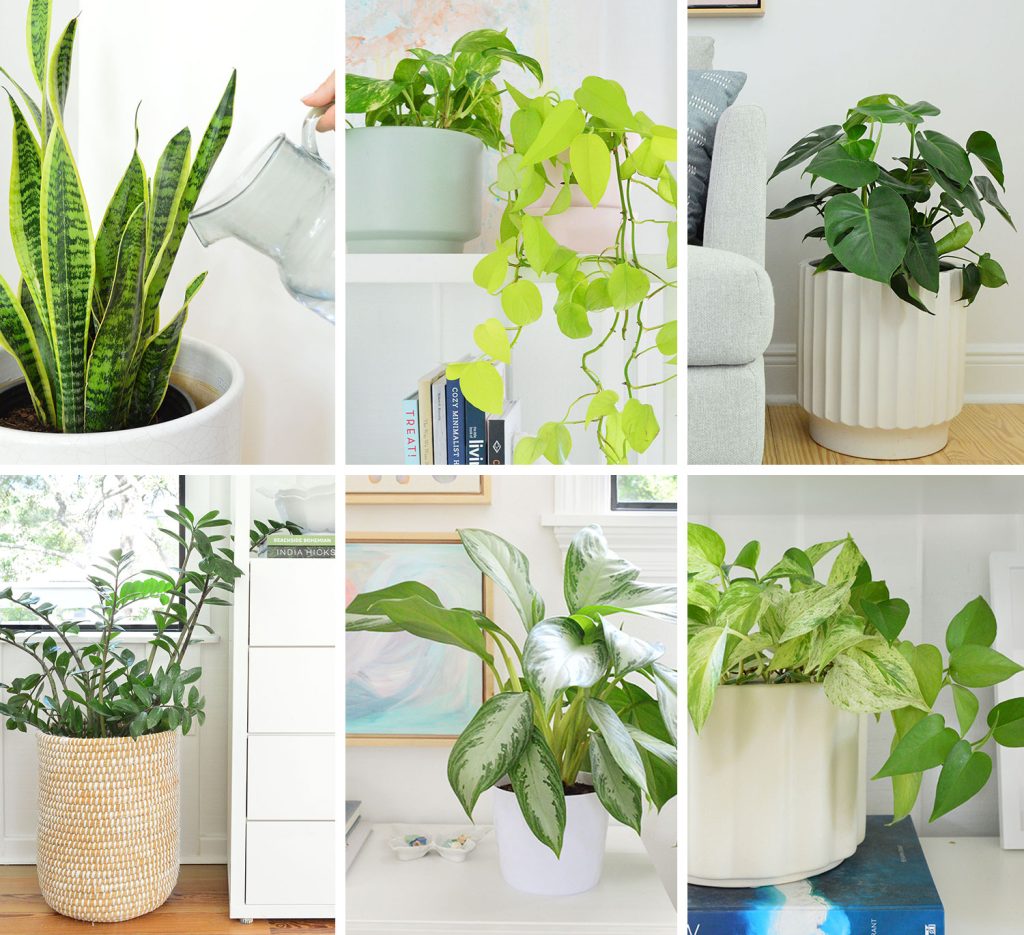
![How To Install a Drip Irrigation System[/gpt3]](https://housefixjournal.site/wp-content/uploads/2026/07/Drip-Irrigation-System-Close-Up.jpg)
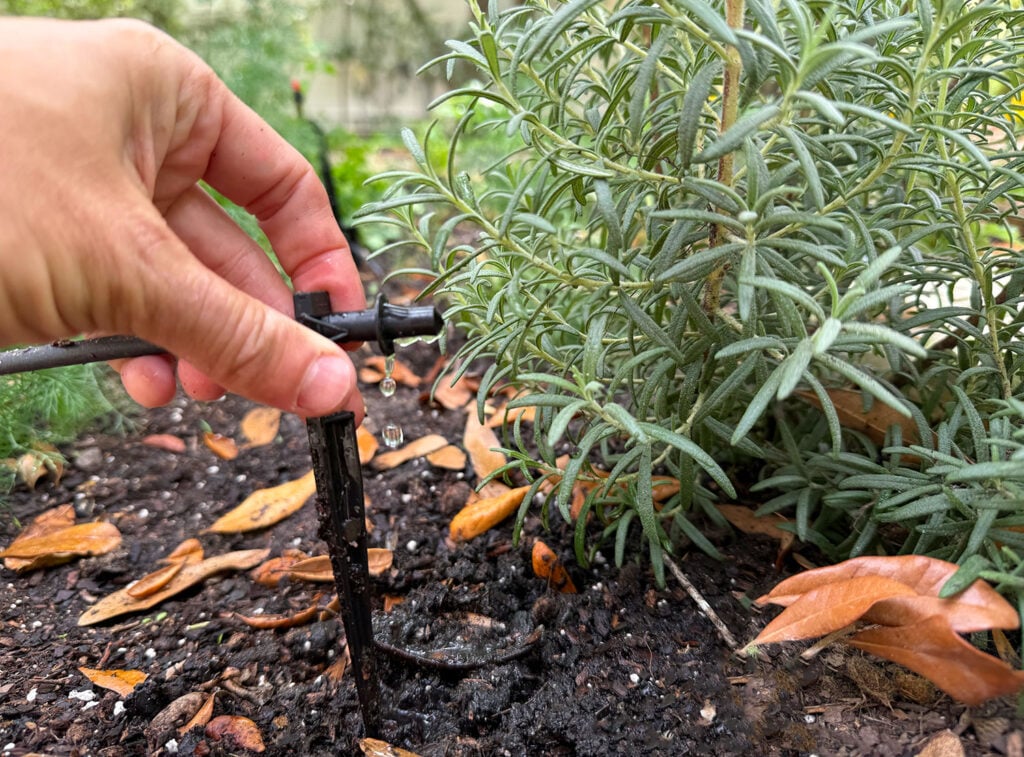
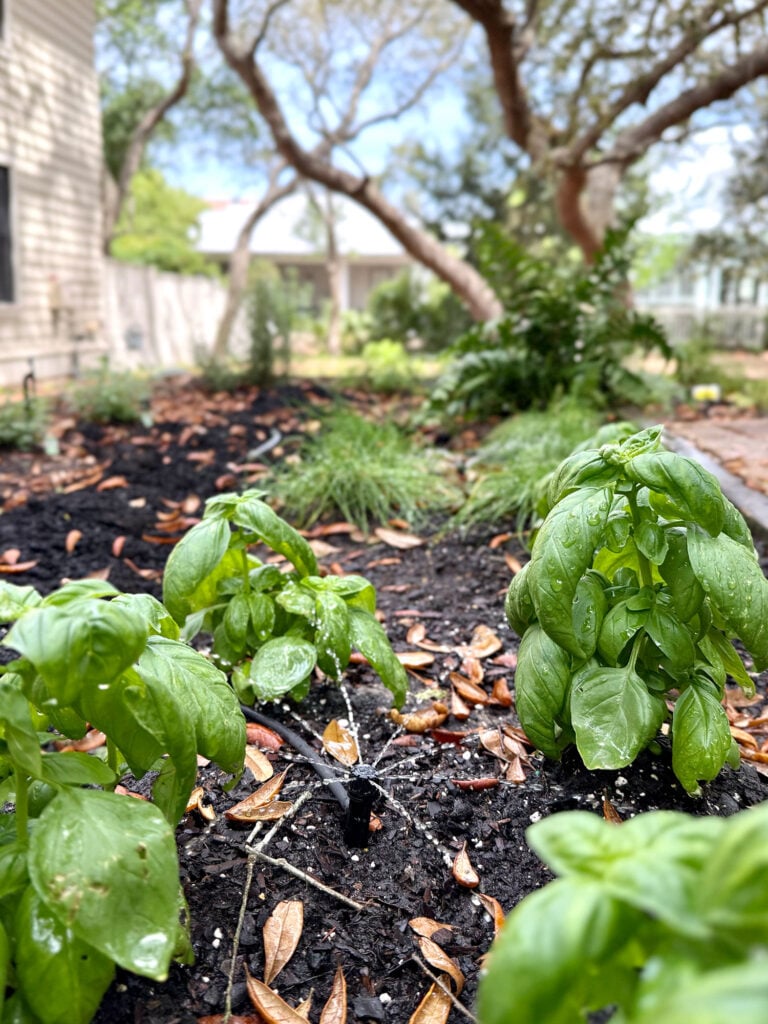
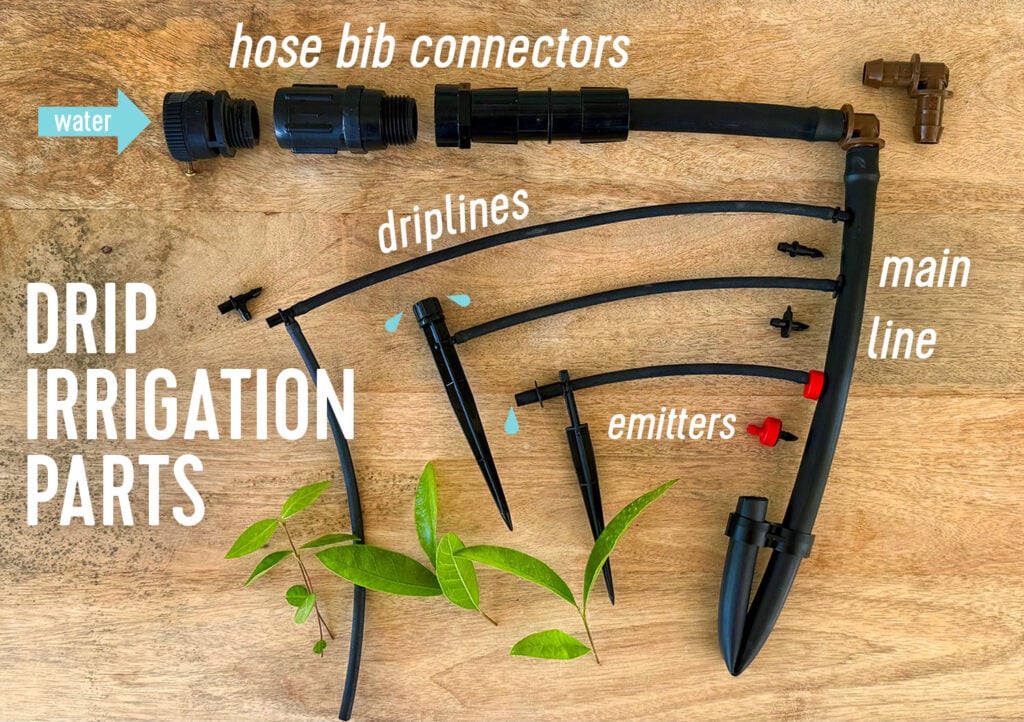
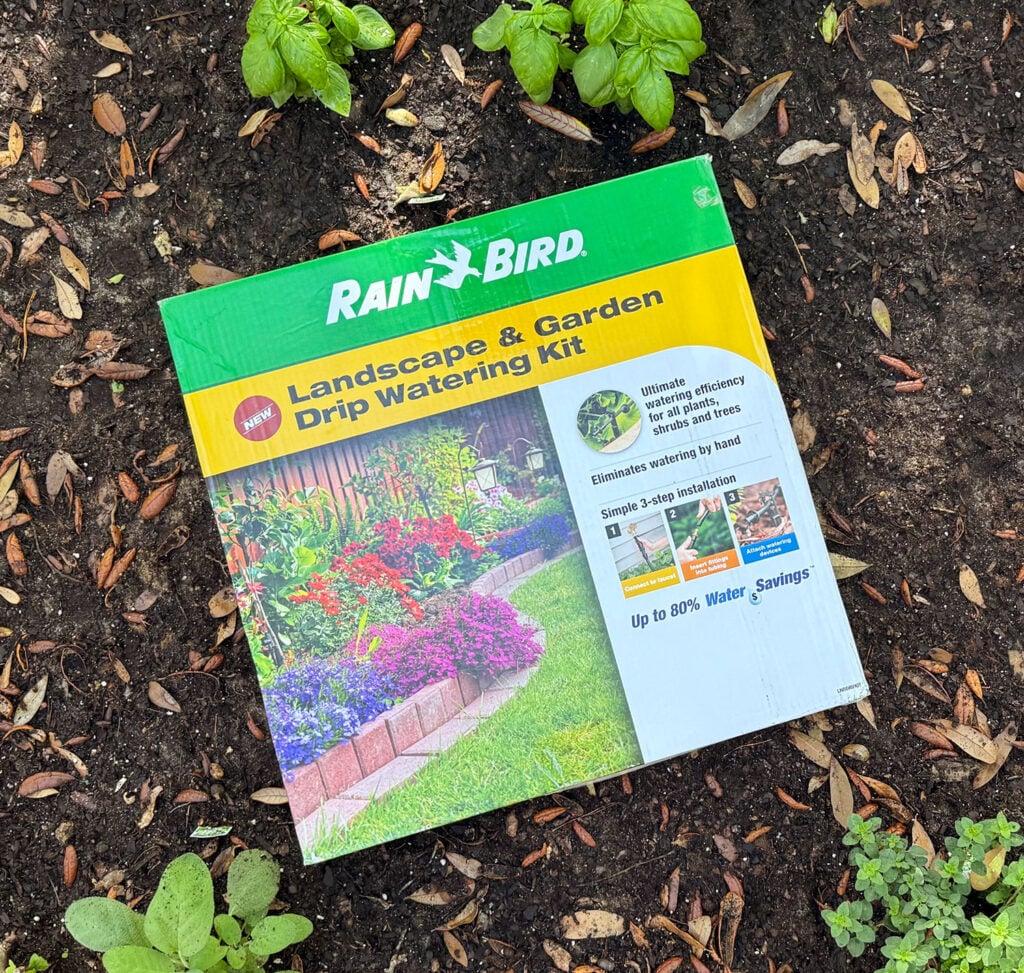
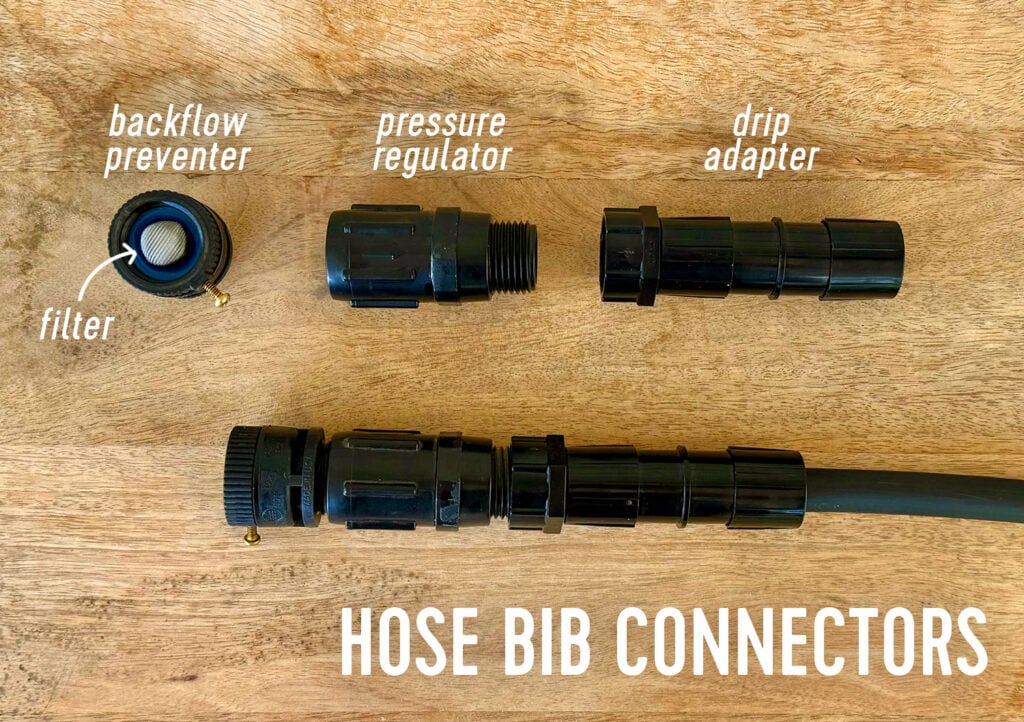
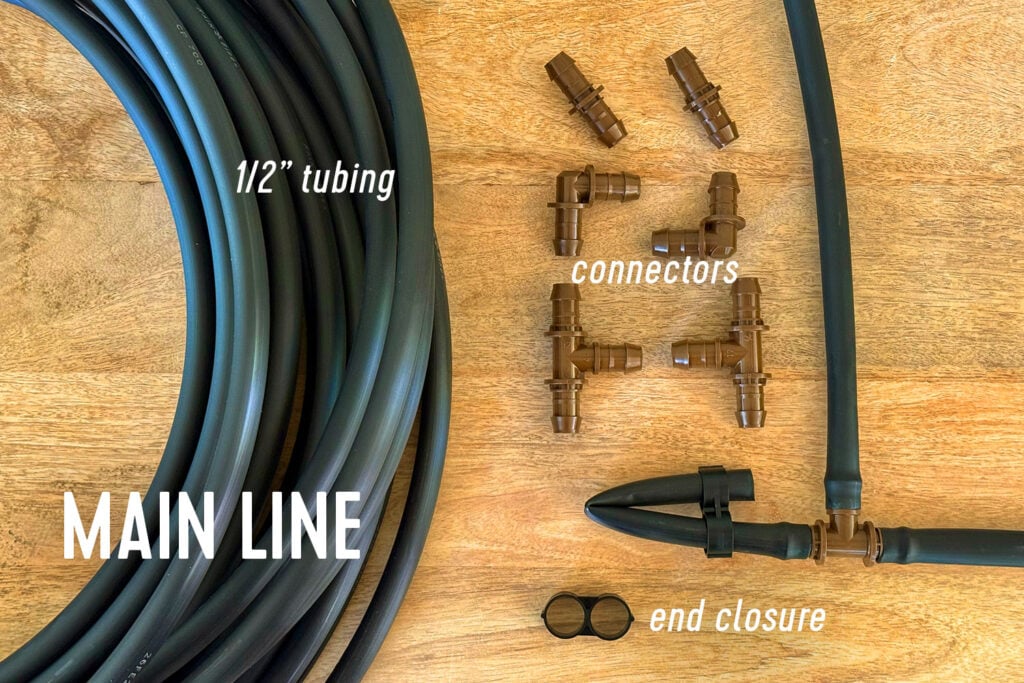
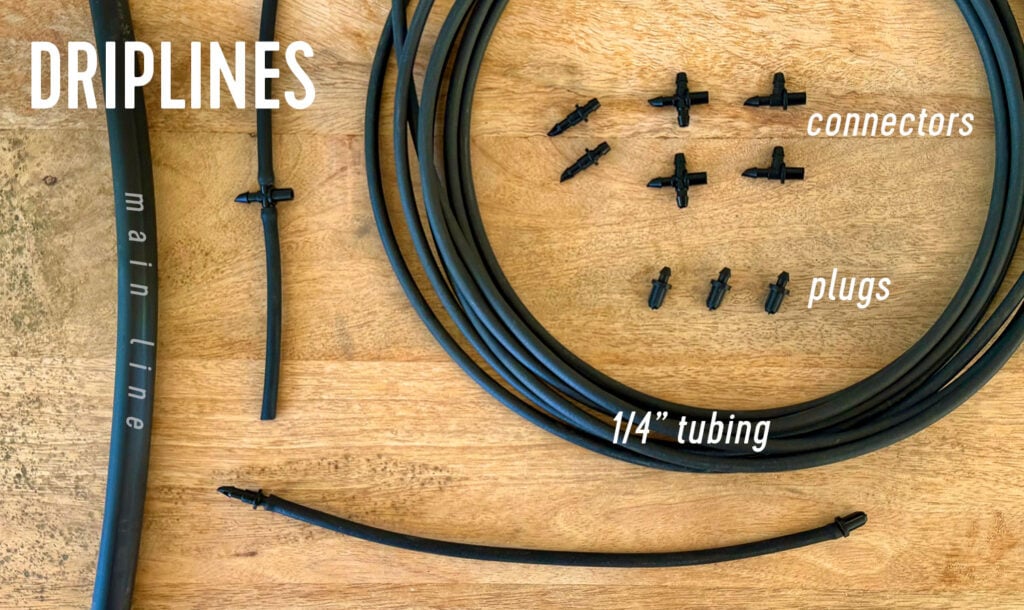
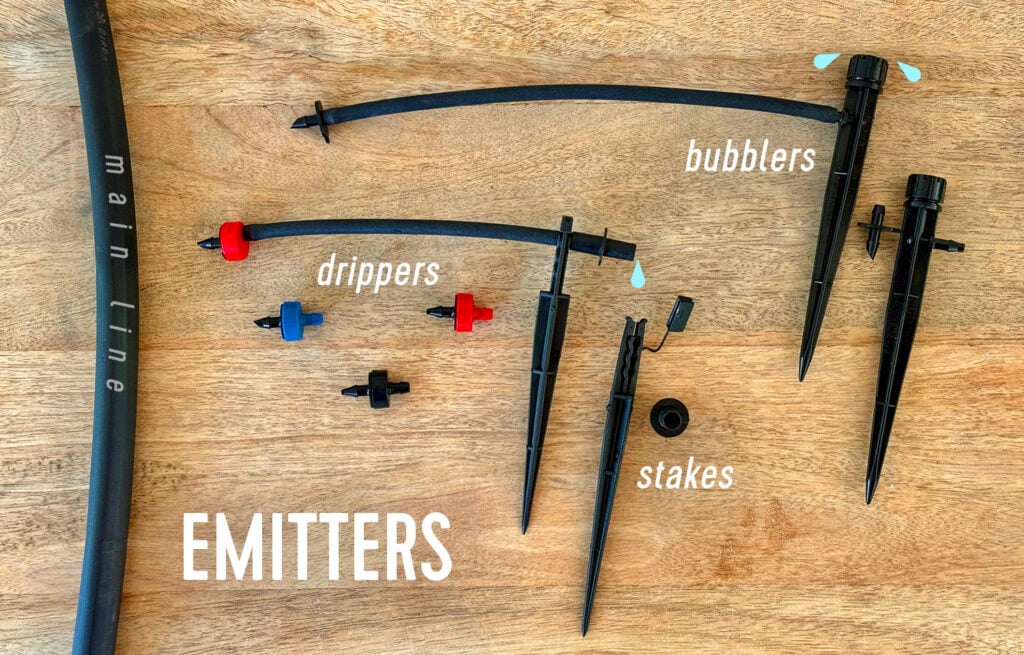
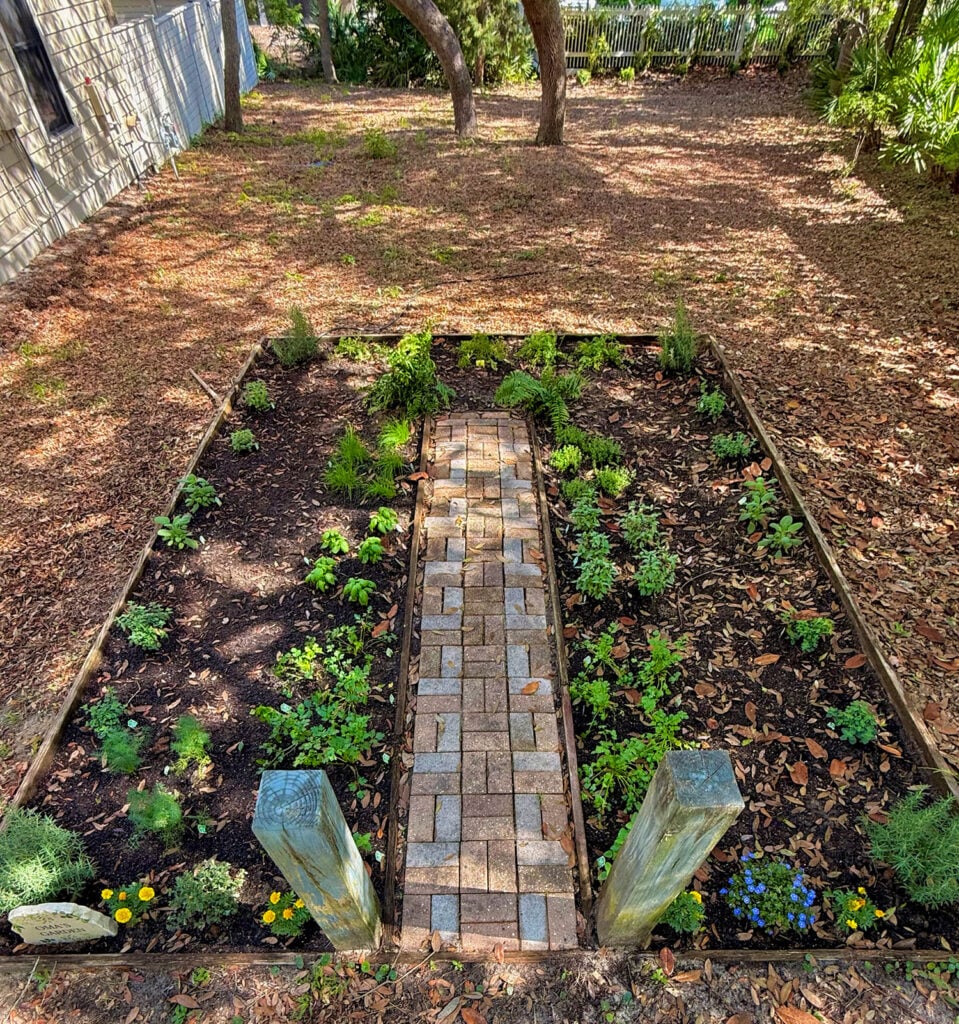
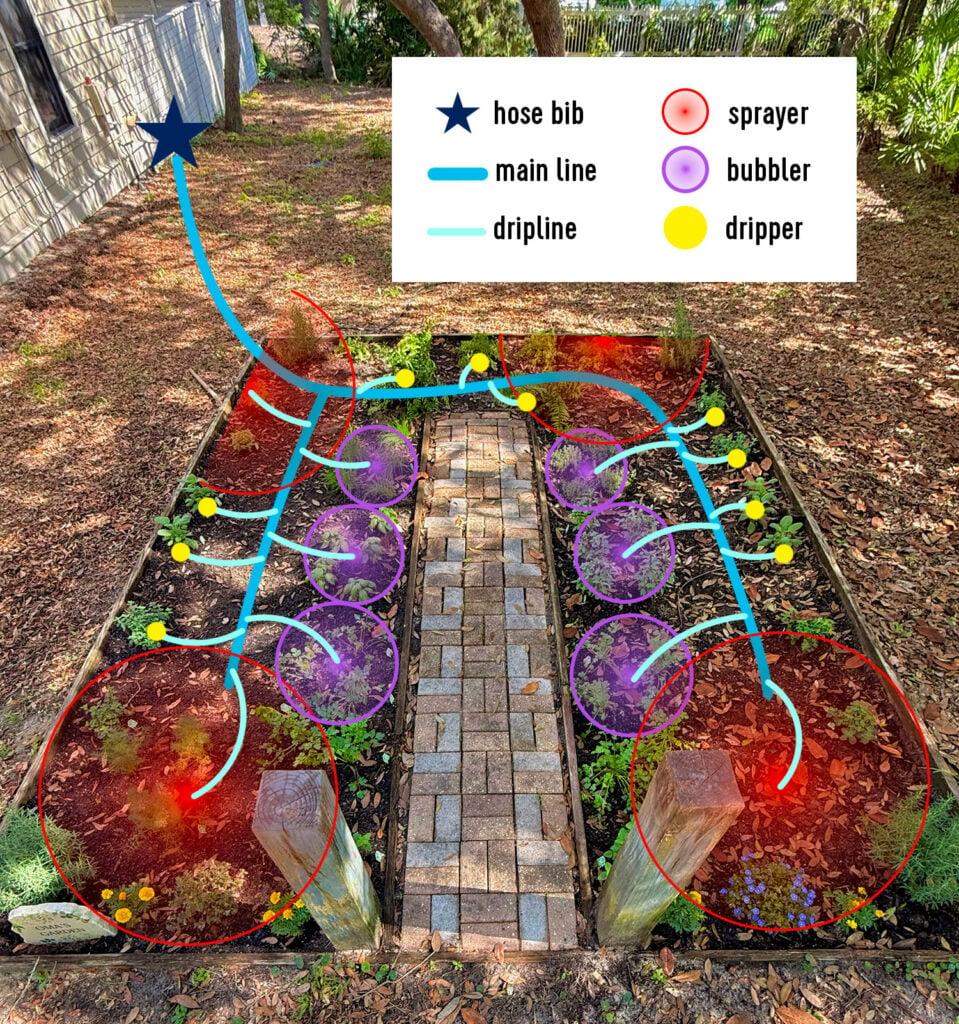
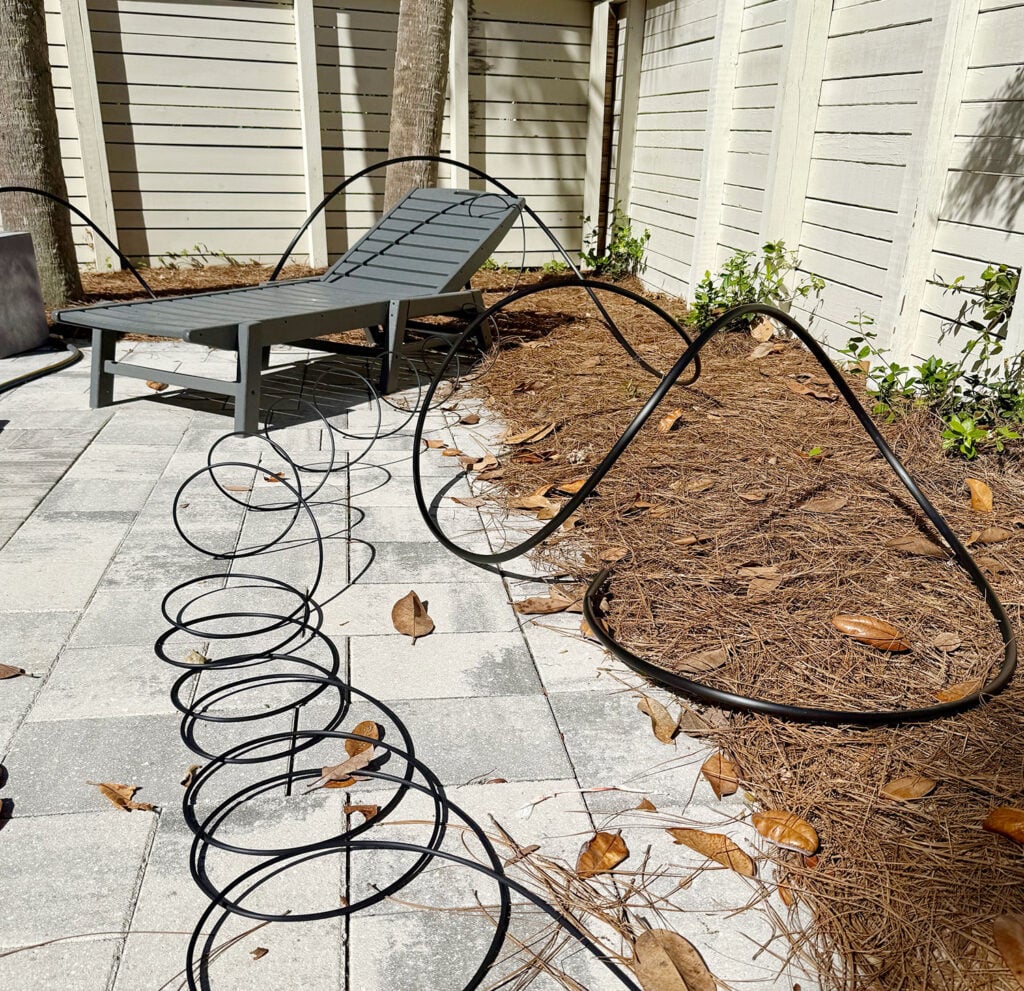
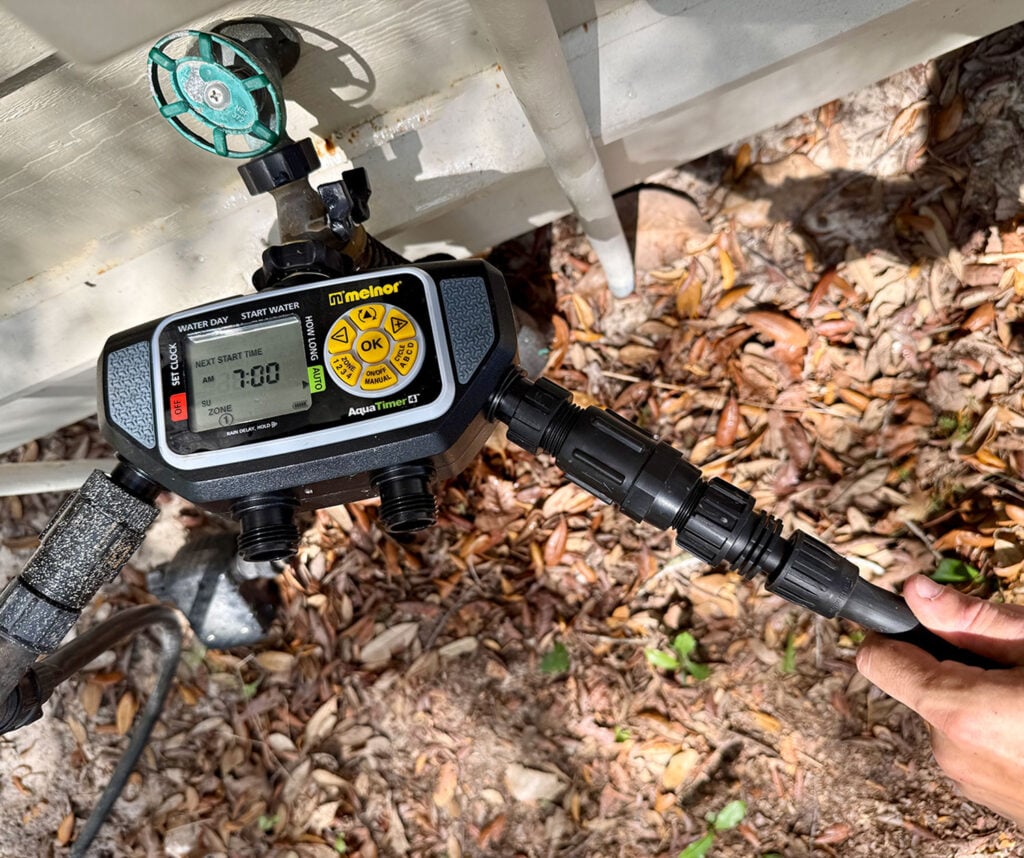
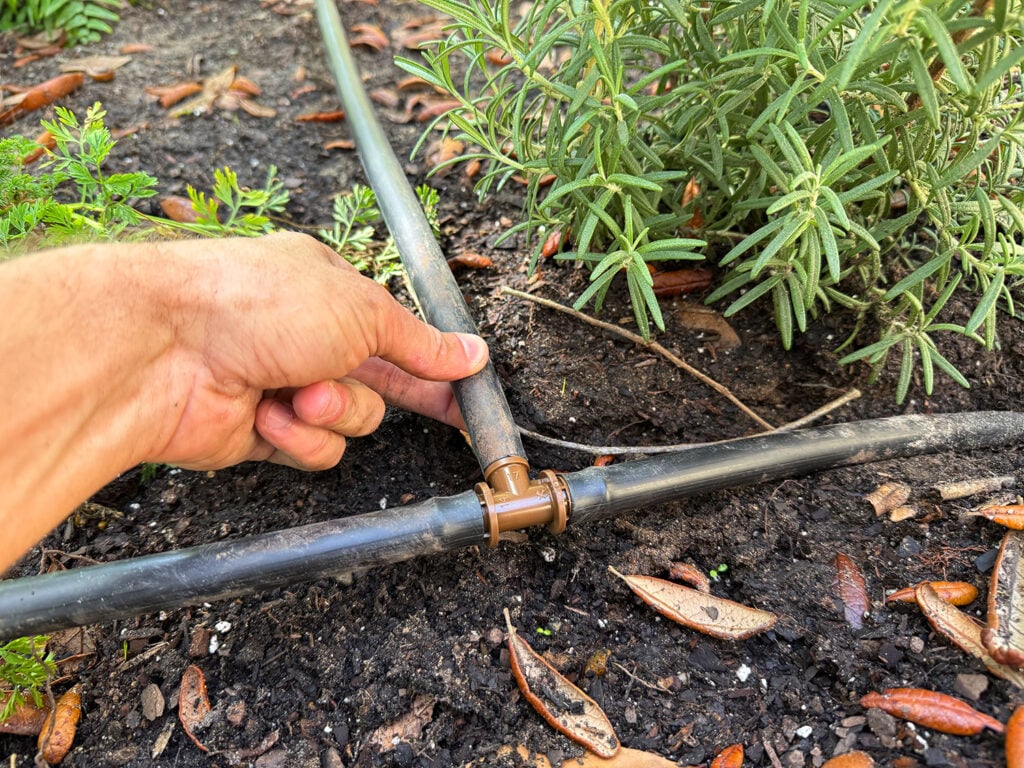
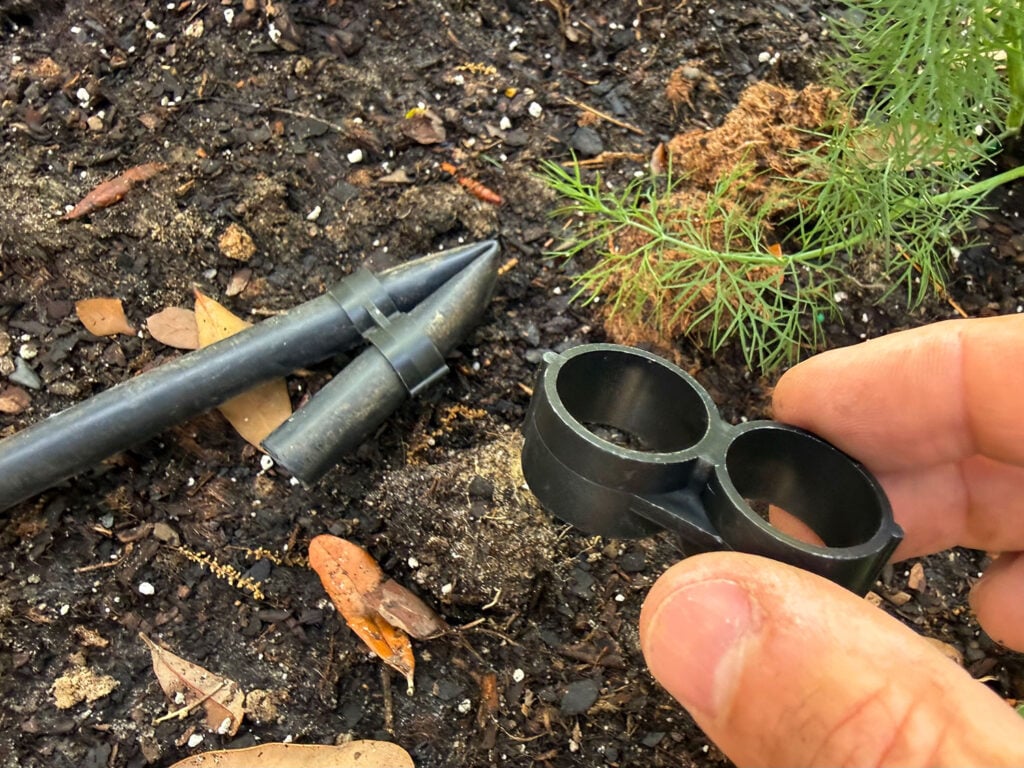
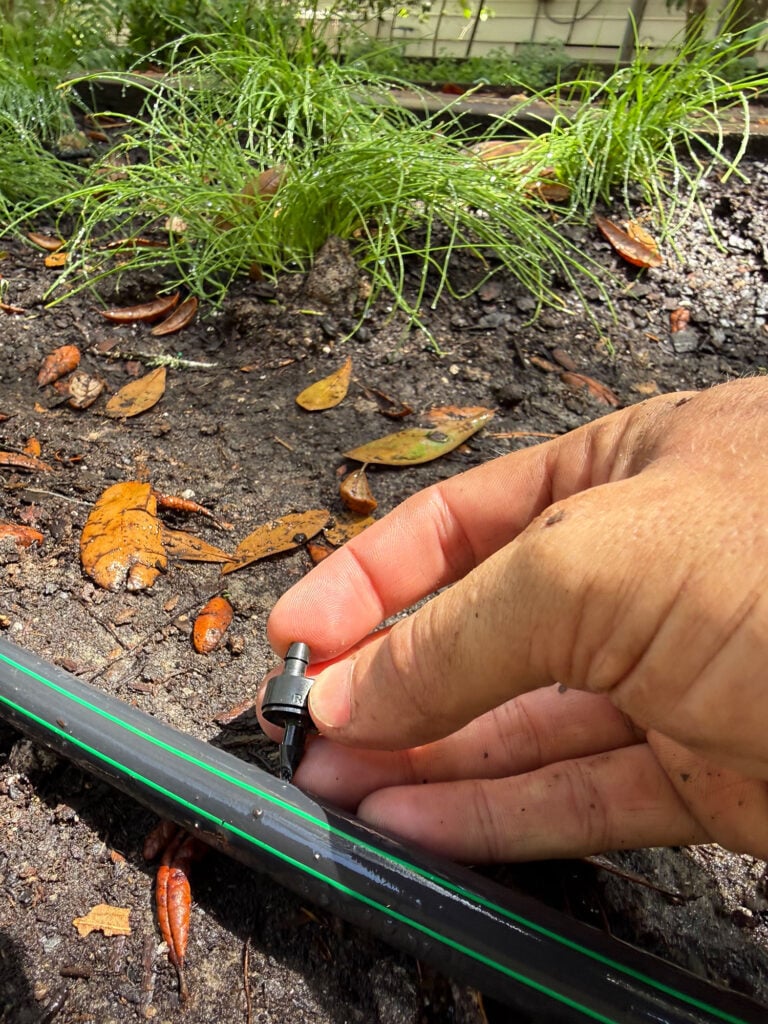
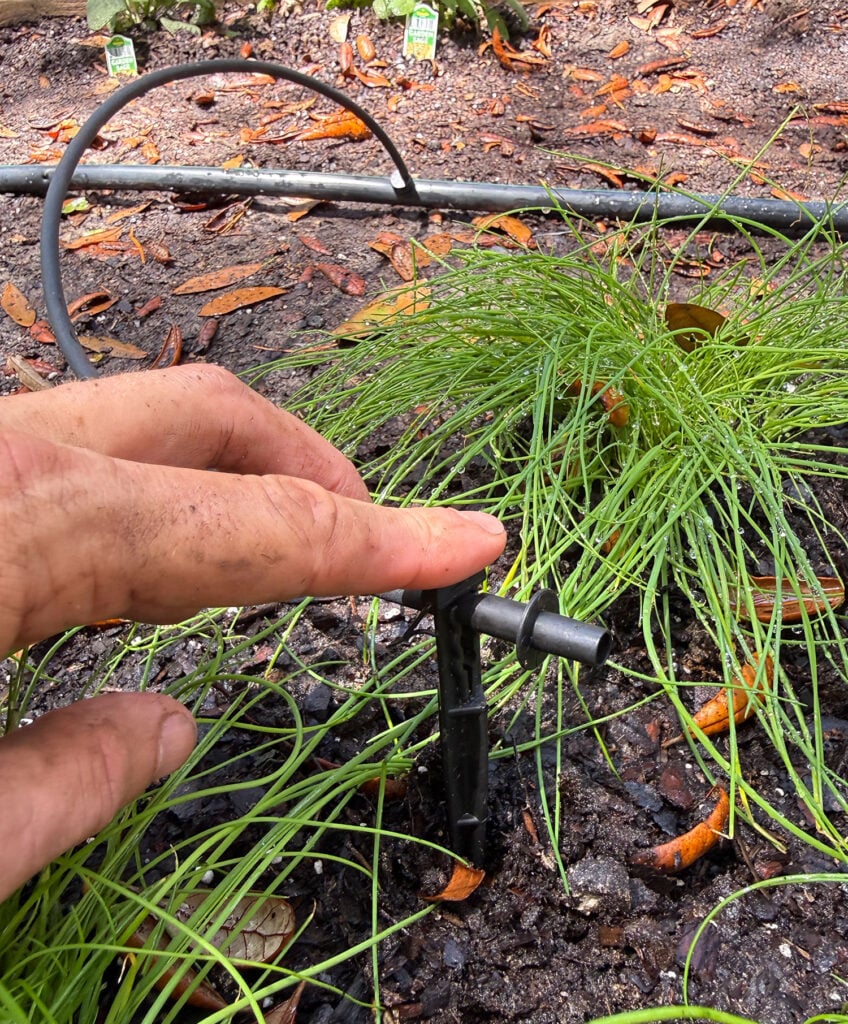
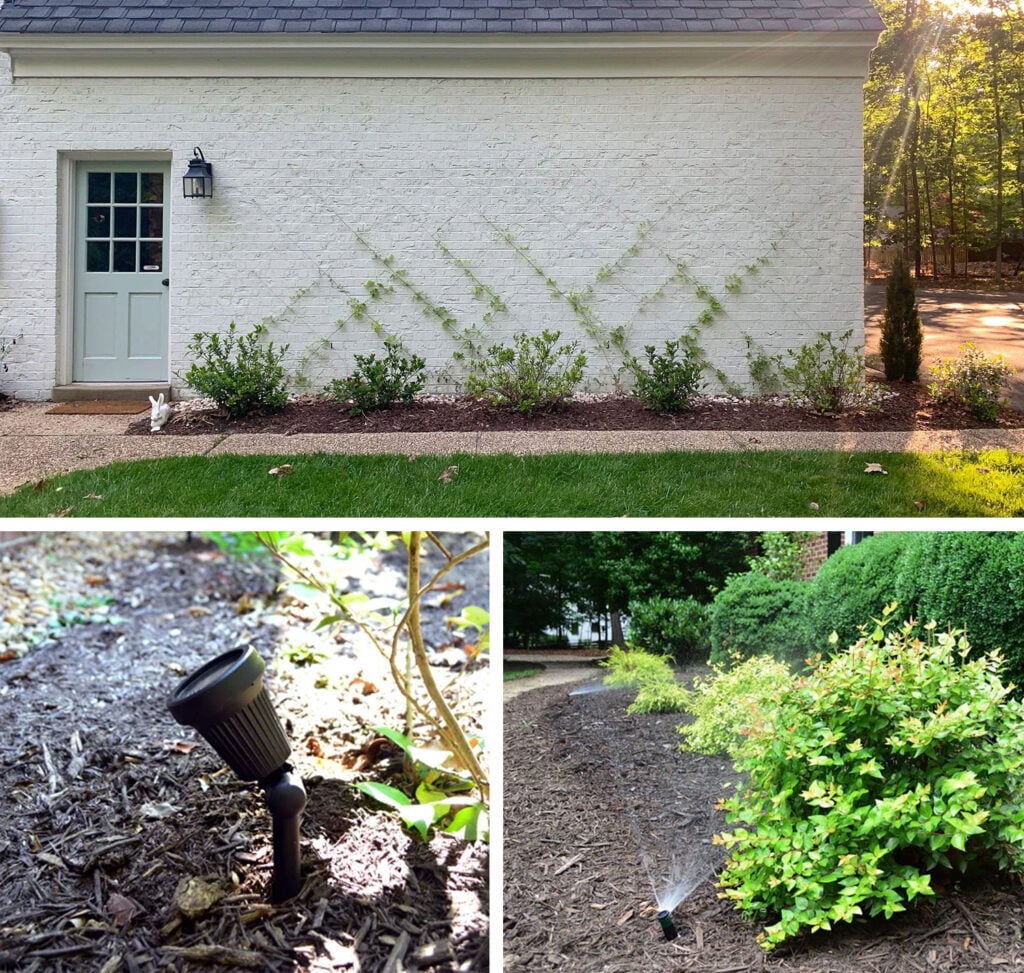
![Every 2027 Color Of The Year (So Far!)[/gpt3]](https://housefixjournal.site/wp-content/uploads/2026/08/2027-Color-of-the-Year-Main-Graphic.jpg)






![How to Plan for a Murphy Bed During a Home Renovation[/gpt3]](https://housefixjournal.site/wp-content/uploads/2026/08/gramercy-park-murphy-bed-studio-renovation-600x400.jpg)